
User Guide
Step-by-step help for shop staff and the company Admin
Contents
1. Getting started
This app runs your shop's billing, stock and accounts in one place: sales and purchases, stock by batch, customer and supplier balances, cash and bank books, GST reports and a full set of accounts. It works in any modern browser on a computer, tablet or phone.
Logging in
- Open the app's web address in Chrome or Edge.
- Type your App Code (your company's code, given by your software provider). The company name appears above the form once the code is recognised.
- Type your Username and Password, then click Login. Capital and small letters don't matter in any of the three boxes.
- If your Admin has set a Login PIN, a PIN box also appears. The PIN must be typed exactly.
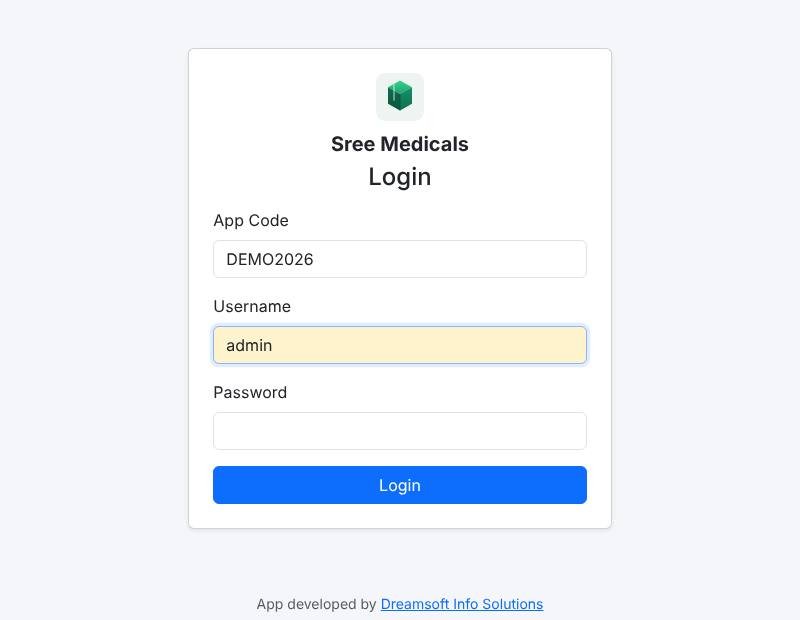
You stay logged in for 8 hours. Click Logout (top right) when you leave a shared computer.
Who can do what (roles)
| Role | What it can do |
|---|---|
| Admin | Everything: all menus, Masters, Settings, Users, and deleting bills. |
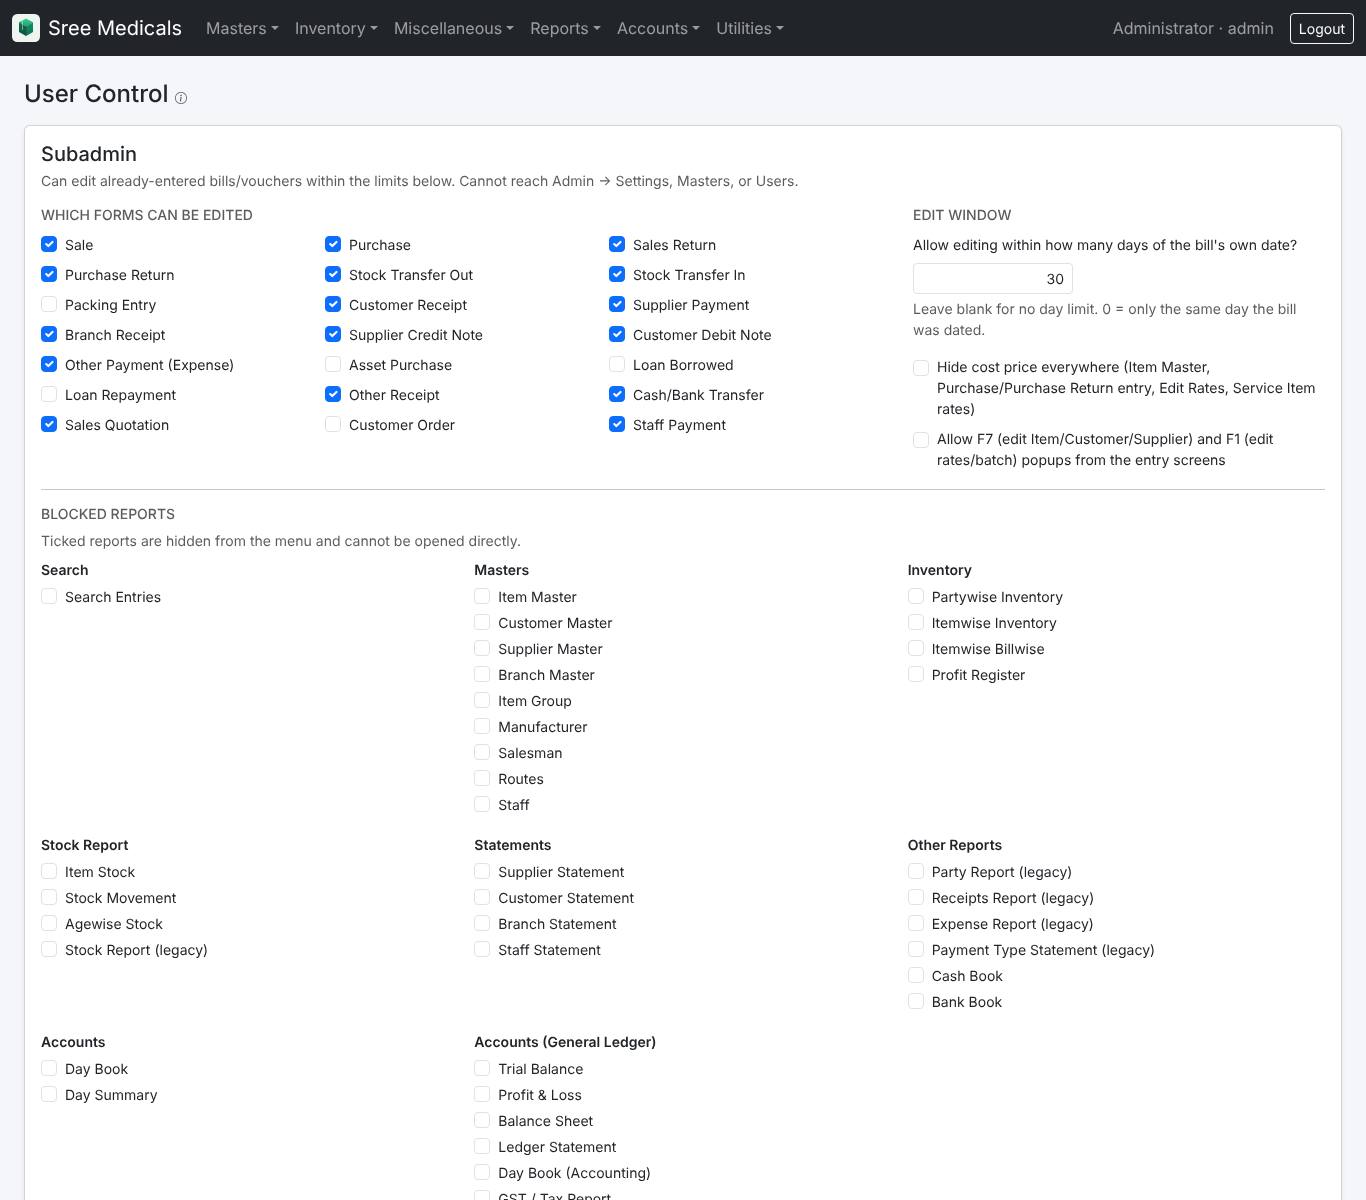
| Subadmin | Makes all entries. Can edit saved entries only for the forms and number of days the Admin allows in Utilities → User Control. No Masters or Settings. |
| User | Makes entries. Editing a saved bill is allowed only for the forms ticked in User Control. |
| Report Only | Can only view and print reports. Clicking a bill opens its print view. |
| Salesman | Logs in to the Salesman Portal to see their customers and collect payments (see section 8). |
Finding this guide again
Click Help in the top menu bar, or the Help link under the Login form. Use the English / മലയാളം buttons at the top of this page to switch language, and Download PDF to keep a printable copy.
Using a phone or tablet
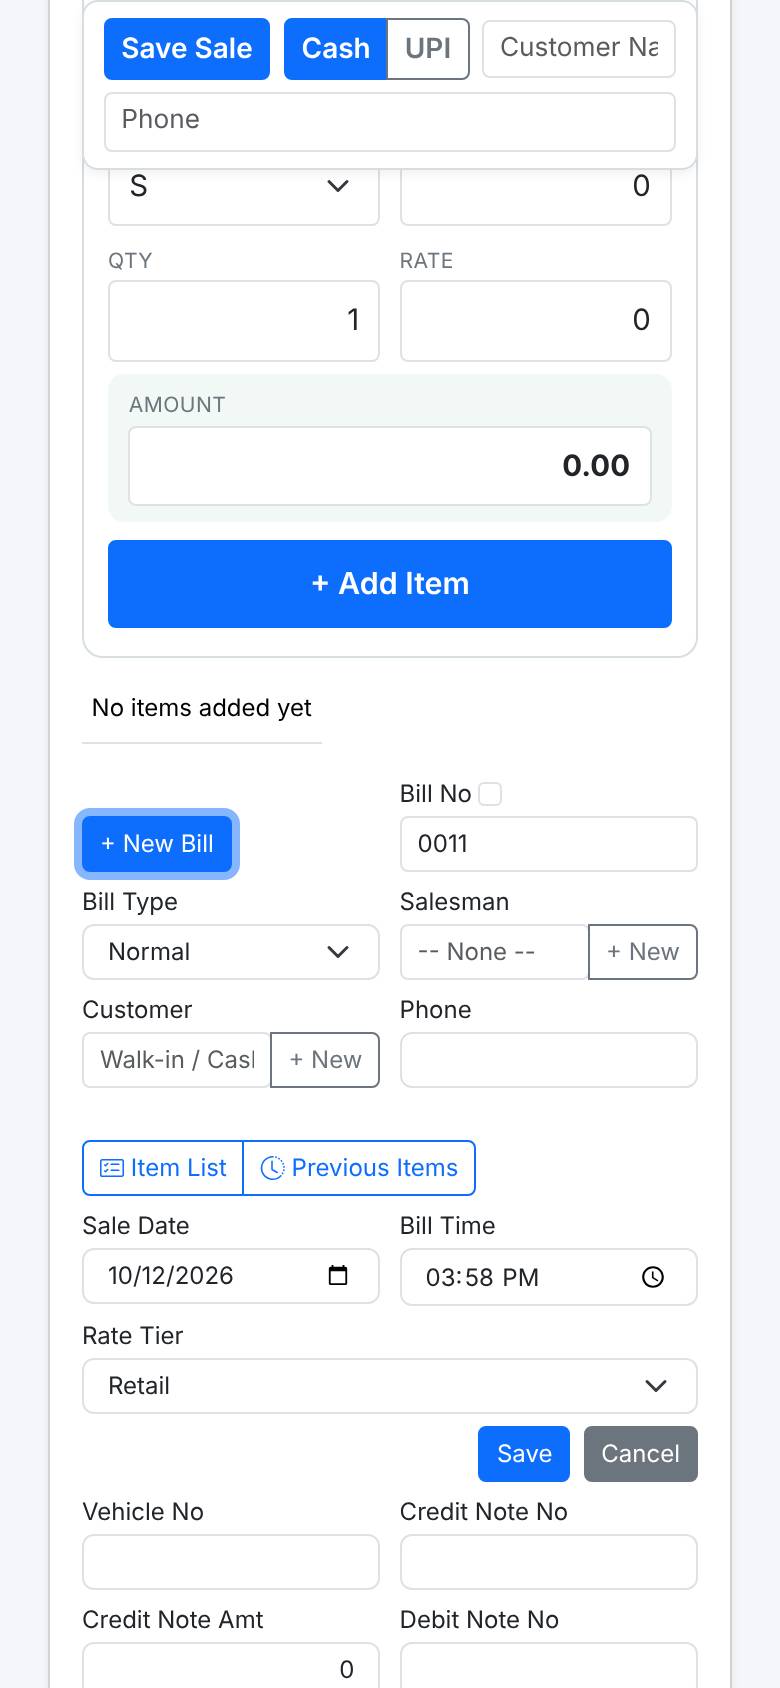
Every page adapts to small screens. The menu folds into the button. On a phone the Sale screen gets a quick bar at the top with Save Sale, Cash/UPI buttons, customer name and phone. In Chrome you can choose Add to Home screen to open the app like an installed app.
2. The Home page
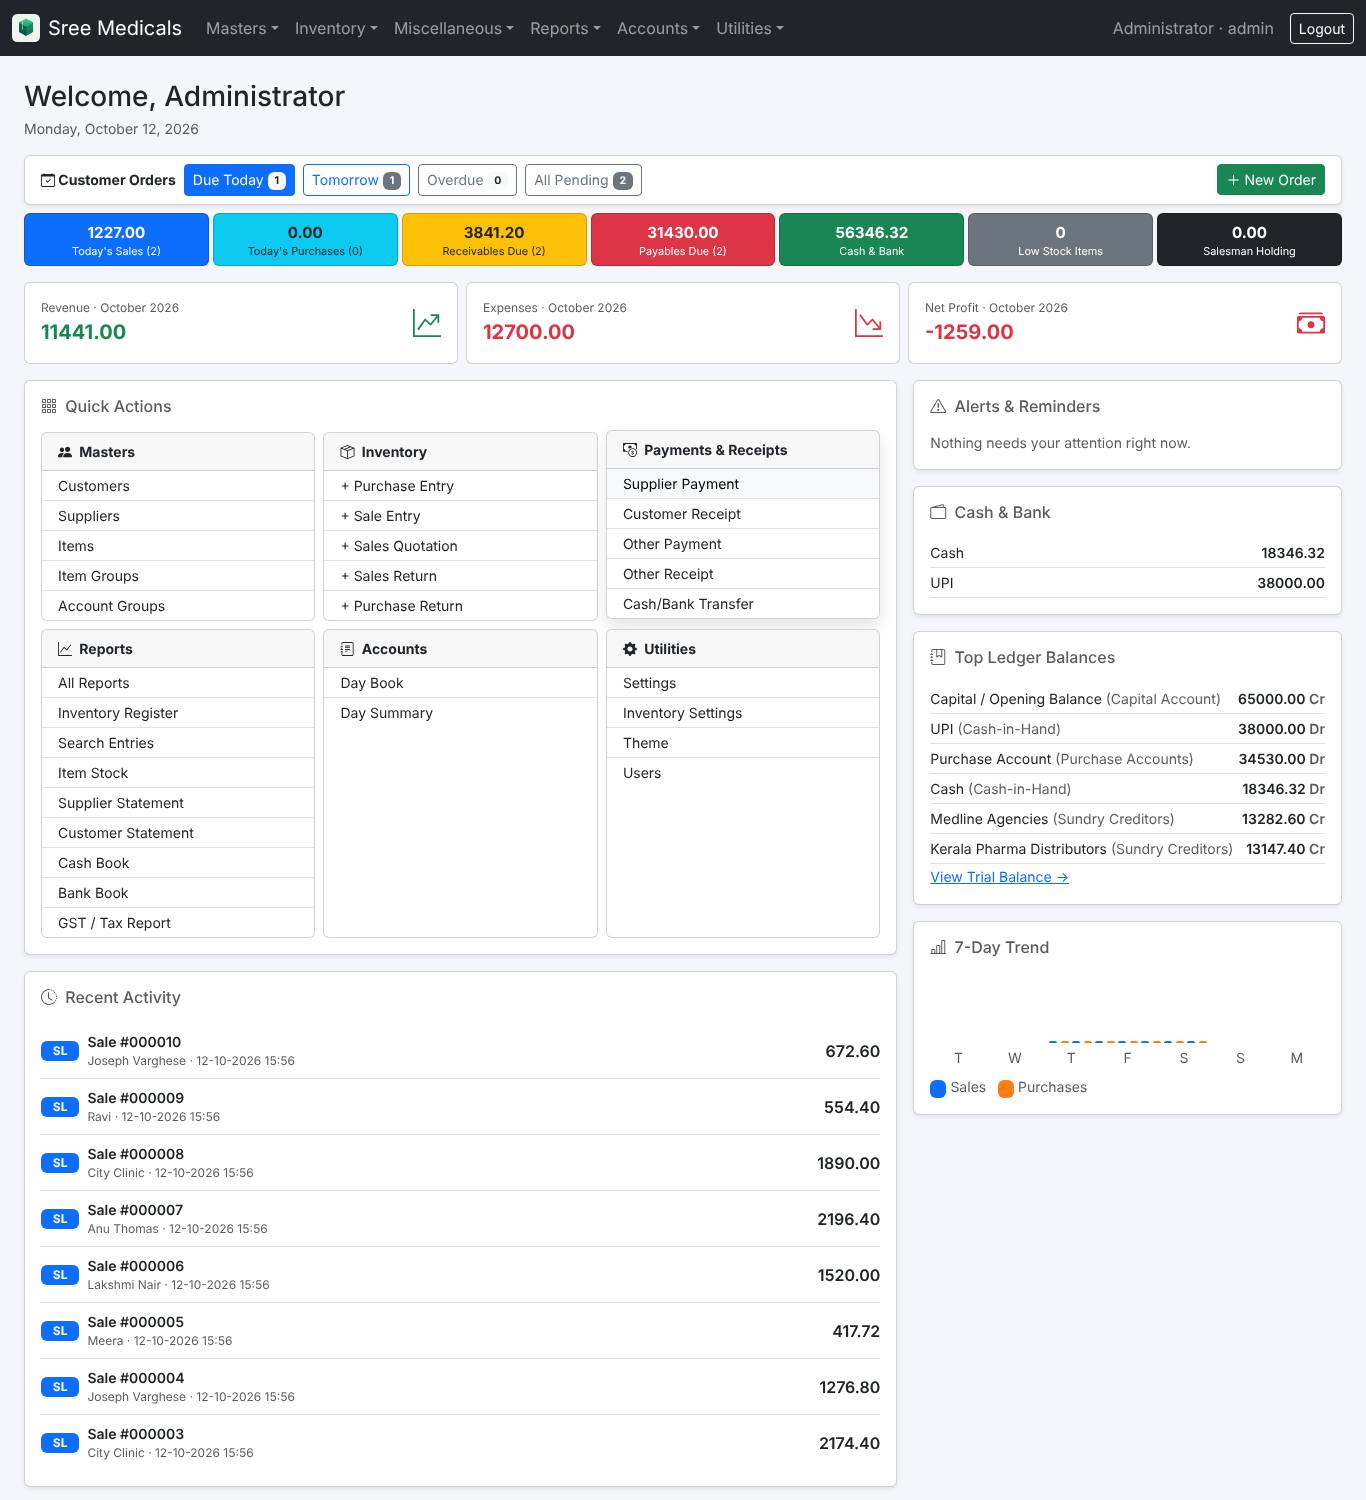
After login you land on the Home page. It gives a quick picture of the business today:
- Coloured tiles: Today's Sales, Today's Purchases, Receivables Due (customers owe you), Payables Due (you owe suppliers), Cash & Bank, Low Stock Items and Salesman Holding. Click a tile to open its report.
- This month: Revenue, Expenses and Net Profit (red when it is a loss).
- Quick Actions: shortcuts to the most used entry screens and reports.
- Recent Activity: the latest bills and vouchers. Click one to open it.
- Alerts & Reminders: low stock, cheques waiting to clear, salesmen holding cash.
- Cash & Bank, Top Ledger Balances and a 7-Day Trend of sales and purchases.
- If Customer Orders is switched on, a strip at the top shows orders Due Today, Tomorrow, Overdue and All Pending.
3. The menus at a glance
| Menu | What you find there |
|---|---|
| Masters (Admin) | Customers, Suppliers, Branches, Items, Item Groups, Manufacturers, Tax Rates, Salesmen, Staff, Account Groups, Ledgers, Loan Accounts, Payment Types, Opening Balances. |
| Inventory | New Purchase, Sale, Quotation, Customer Order, Sales Return, Purchase Return, Stock Transfer Out/In, Packing, Purchase Ordering, E-Invoice, Barcode Reprint, Weigh Scale Items. |
| Miscellaneous | Payments & Receipts (supplier payments, customer receipts, notes, staff, other payment/receipt, assets, loans, transfers, journal), Salesman Collection, Quick Item Search, Search Entries, Edit Rates, Edit Items, Numbering Settings, Financial Years. |
| Reports | All Reports, master lists, Inventory Register and item/party reports, stock reports, statements, payment lists, GST / Tax, Cash Book, Bank Book, Loyalty Points. |
| Accounts | Day Book, Day Summary, Trial Balance, Profit & Loss, Balance Sheet, Ledger Statement. |
| Utilities (Admin) | Settings, Inventory Settings, Bill Print Settings, Custom Fields, Barcode and Weigh Scale settings, E-Invoice settings, Theme, Users, User Control. |
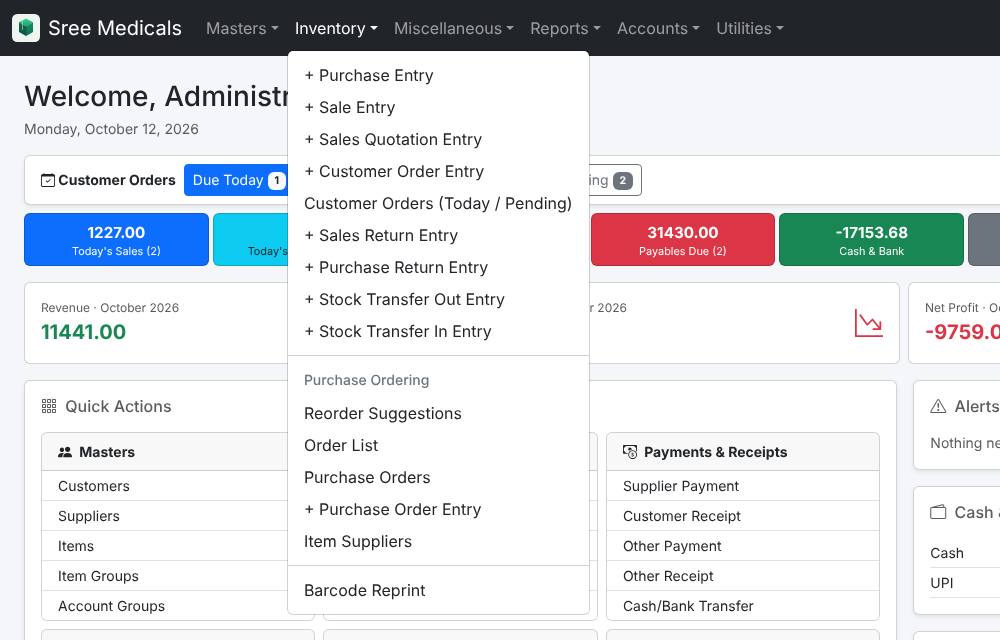
Some menu items appear only when the matching feature is switched on in Utilities → Inventory Settings (for example Customer Orders, Salesman, Loyalty Points).
4. Making a Sale (billing)
Open Inventory → + Sale Entry. The screen has four parts: the header (bill details and customer), Item Entry (where you type one item at a time), Added Items (the bill's lines) and the footer (discount, payment and totals).
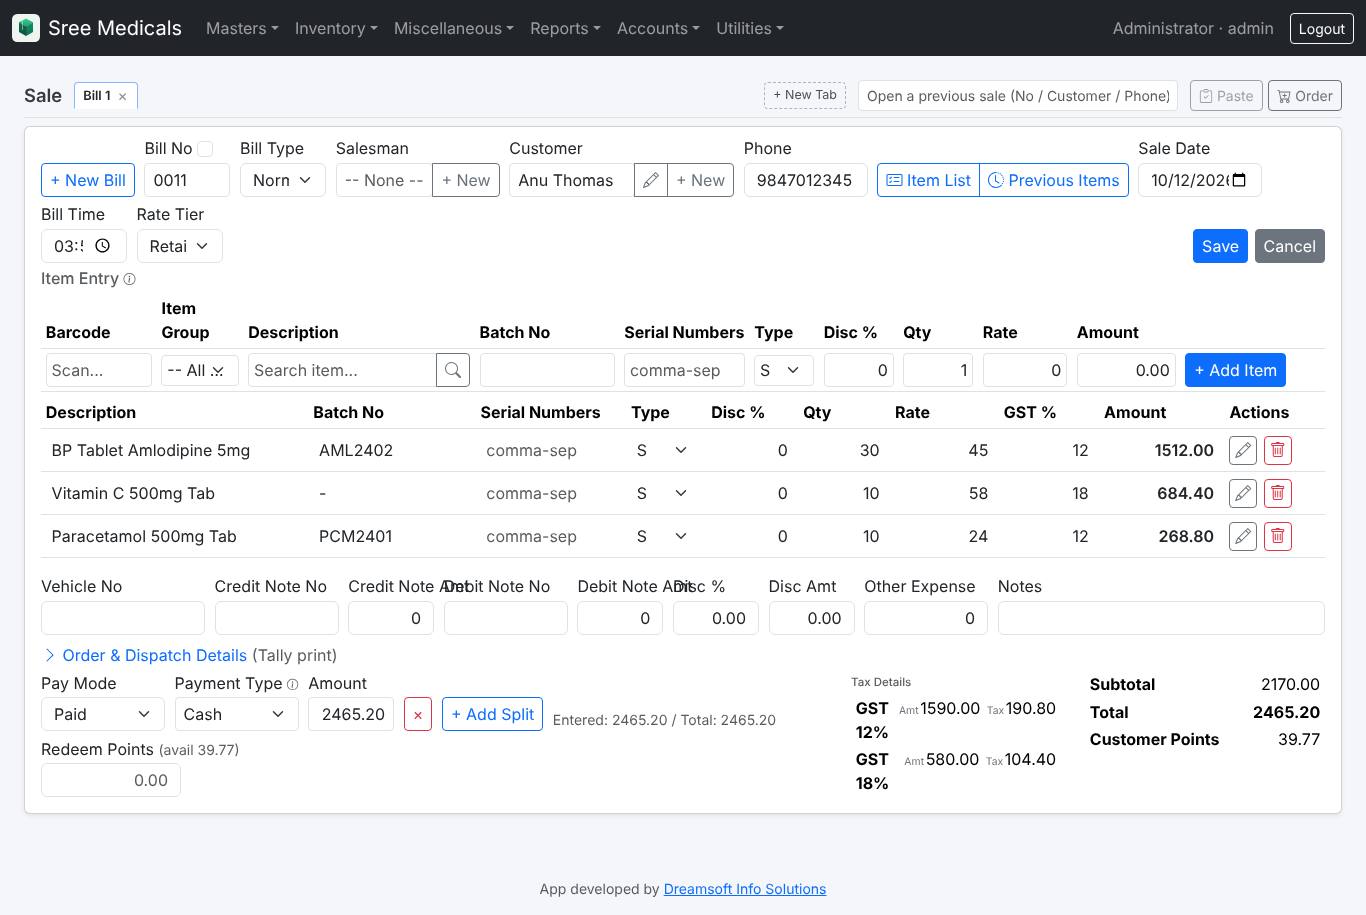
Step by step
- Customer. For a walk-in customer you can leave it blank or just type a name. For a regular customer, type part of the name, code or phone and press Enter (or pick from the list with ↓/↑). + New or F2 adds a new customer without leaving the bill.
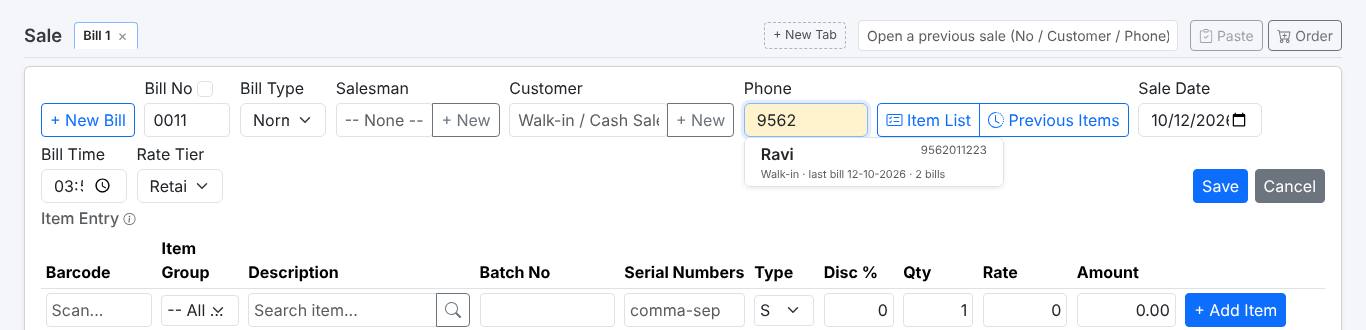
- Phone. Typing 3 or more digits of a phone number suggests saved customers and earlier walk-in customers with that number, so you don't need to type the name again.
- Add items. In Description, type part of the item name, code or generic name, or scan the barcode into Barcode. Pick the item with Enter. If the item has several batches, a batch list opens; with one batch it is picked for you.
- Quantity. Type the quantity and press Enter. When the rate is already filled, the line is added straight away and the cursor goes back for the next item.
- Payment. Choose Pay Mode: Paid (enter Payment Type and Amount, or + Add Split to split between Cash and UPI) or Credit (optionally with an advance).
- Save with the Save button or F10. F12 saves and prints. The form stays open, ready for the next bill (+ New Bill).
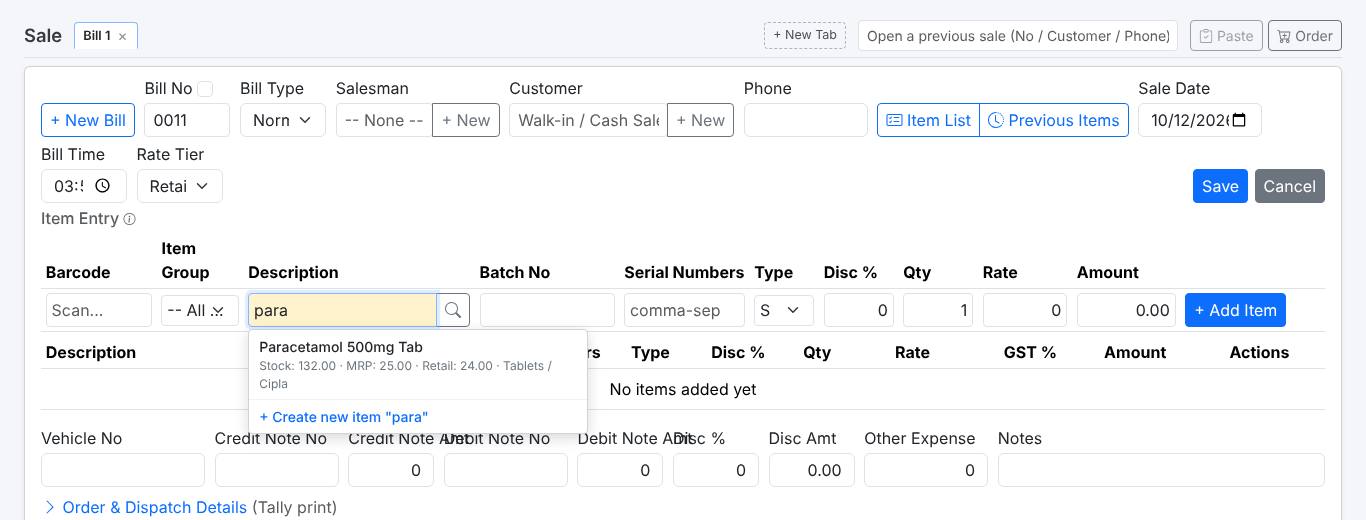
Quantities, free items and line types
- 10+1 in Qty means 10 paid and 1 free. Only 10 is charged; 11 leave stock.
- Scanning 10+barcode into the Barcode box adds the item with quantity 10.
- Type column: S is a normal sale line, F is a different item given free, R is a free replacement. F and R lines are charged 0 but still reduce stock.
- To change a line already added, click its button; it goes back into Item Entry. removes it.
- Rate Tier (Retail / Wholesale / Card) chooses which rate is filled in. A customer can have a default tier.
Payment, old balance and points
- Old Balance shows what a saved customer already owes (only when it is not zero).
- Paid with no amount entered is saved as fully paid in cash when the company's default Pay Mode is Paid.
- Redeem Points (when Loyalty Points are on): the customer's available points are shown. Type the points to use; 1 point = ₹1. The bill total and GST stay the same; only the Balance to Collect goes down.
- Points earned on the bill and the customer's total points print on the bill.
Customer Item List and Previous Items
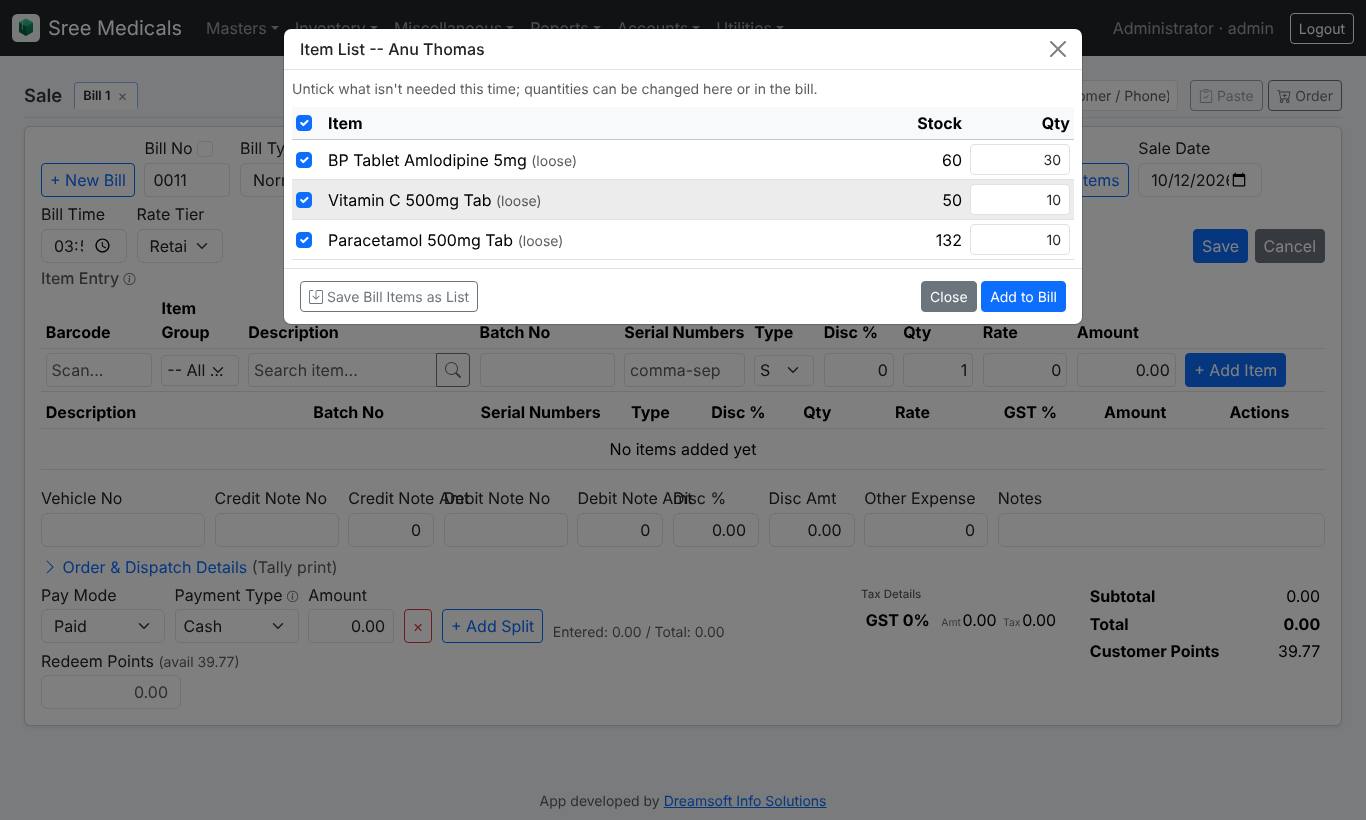
When switched on, two buttons appear next to Phone:
- Item List: fills the bill with the customer's regular items (for example a monthly medicine list). Untick what is not needed this time, change quantities and click Add to Bill. Save Bill Items as List keeps the bill's items as the customer's list for next time.
- Previous Items: everything the customer bought before, latest first, with last date, rate and stock. Tick the items and click Add to Bill. Walk-in customers are found by phone number.
Several bills at once, copy and paste
- + New Tab opens another bill without losing the one you are on, for example when the next customer is waiting. Each tab is named after its customer. Unsaved tabs survive a page refresh on the same computer.
- Open a previous sale (top bar): search by bill number, customer or phone to open an old bill.
- Copy on a saved bill, then Paste on any new bill (even a Purchase or Quotation) to bring the same items in. You can paste the same copy many times.
- The Bill No tick box lets an Admin type a bill number by hand, for example to reuse the number of a deleted bill.
- Bill Type: Normal or Quick. A Quick bill has no tax and its own number series.
Printing the bill
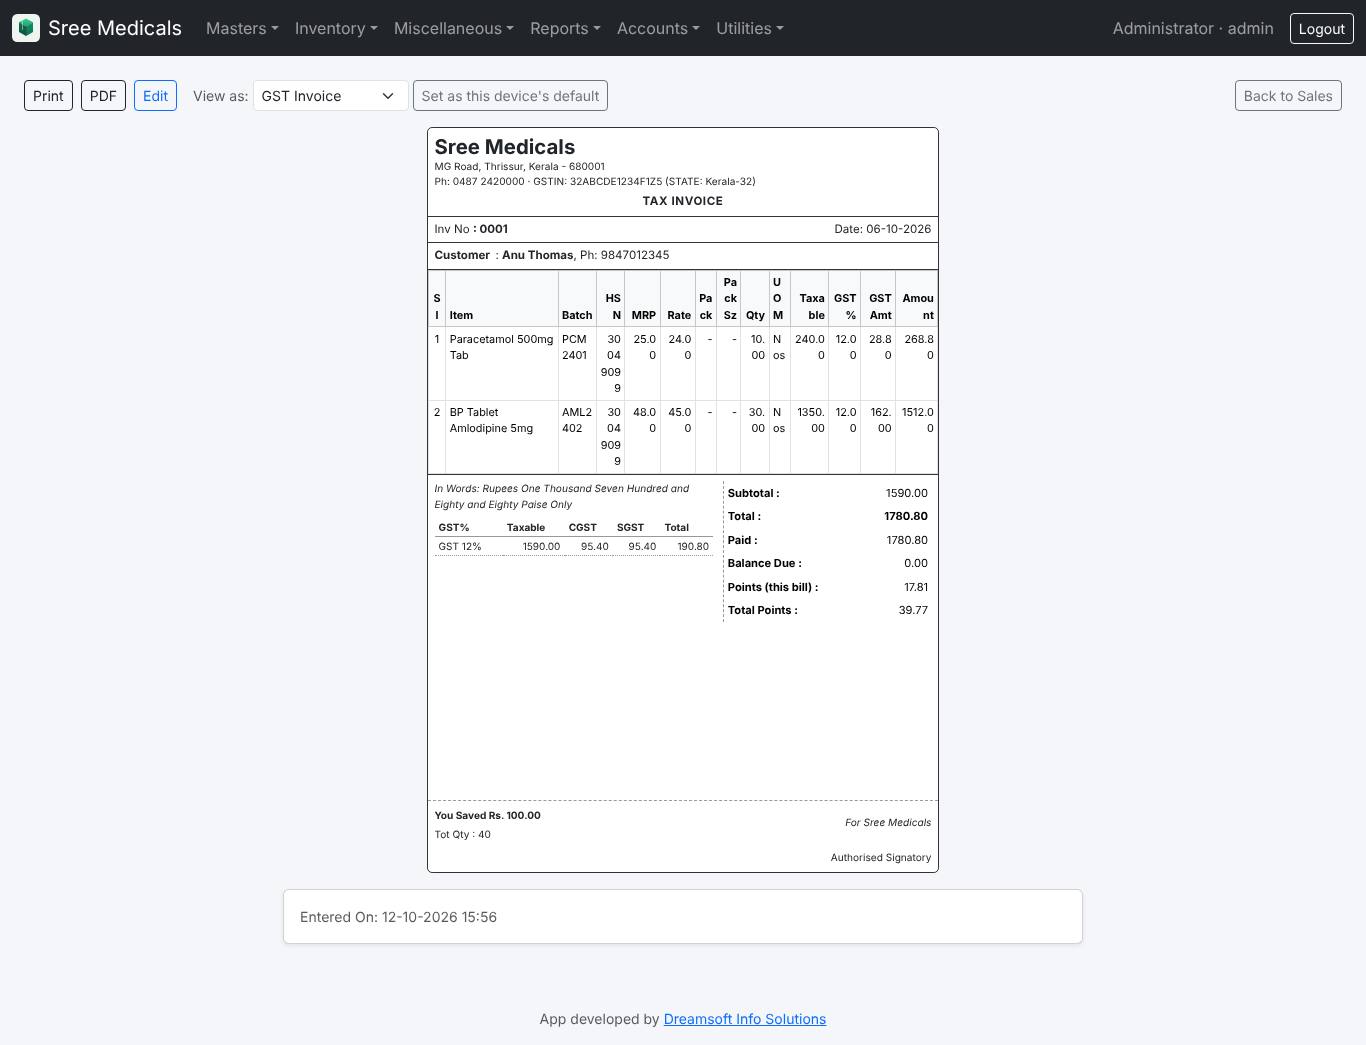
After saving, use Print (or F11, or F12 to save and print in one go). The print page shows the bill in the company's chosen style (Classic, Modern, Compact, GST Invoice, Thermal 3 inch or Tally style). If more than one style is allowed, a View as switch lets you pick another, and Set as this device's default remembers it for this computer. PDF downloads the bill as a PDF to send on WhatsApp or email.
Opening, editing and deleting a saved bill
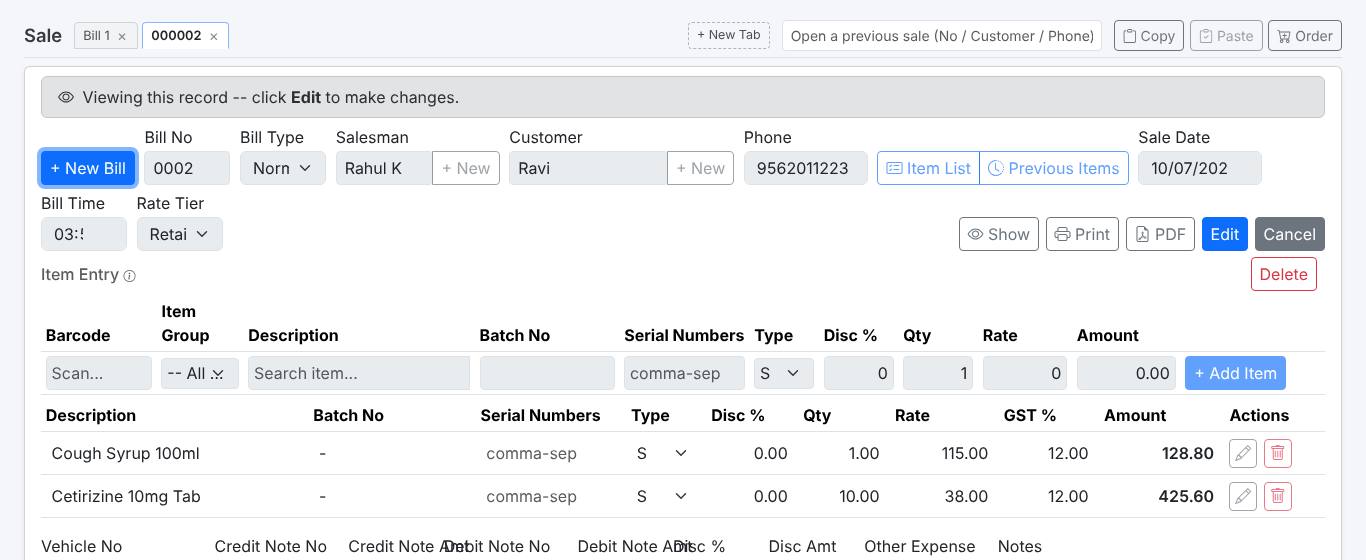
- A saved bill opens locked so nothing changes by accident. Click Edit to unlock it, make changes and click Update.
- If your role is not allowed to edit that bill (or it is older than your allowed number of days), it opens as View Only.
- Delete (Admin only) removes the bill, gives the stock back and removes its payments. It is refused when a salesman collection, a bill-wise receipt or an e-invoice is attached; remove those first.
When stock is short
Depending on the Negative Stock setting, a sale of more than the stock is blocked, asks for confirmation, or is allowed. Expired batches are not offered.
5. Purchases
Open Inventory → + Purchase Entry. It works like a Sale, with the Supplier instead of the Customer.
- Pick the Supplier and type the supplier's Invoice No and date.
- For each item: pick the item, then the Batch (pick an existing one or type a new batch number, with expiry date if needed), quantity, purchase rate, discount and tax. The sale rates (Retail/Wholesale/Card) and MRP for the batch can be filled in on the same line.
- Use the footer for discount, other expenses and payment (Paid or Credit), then Save.
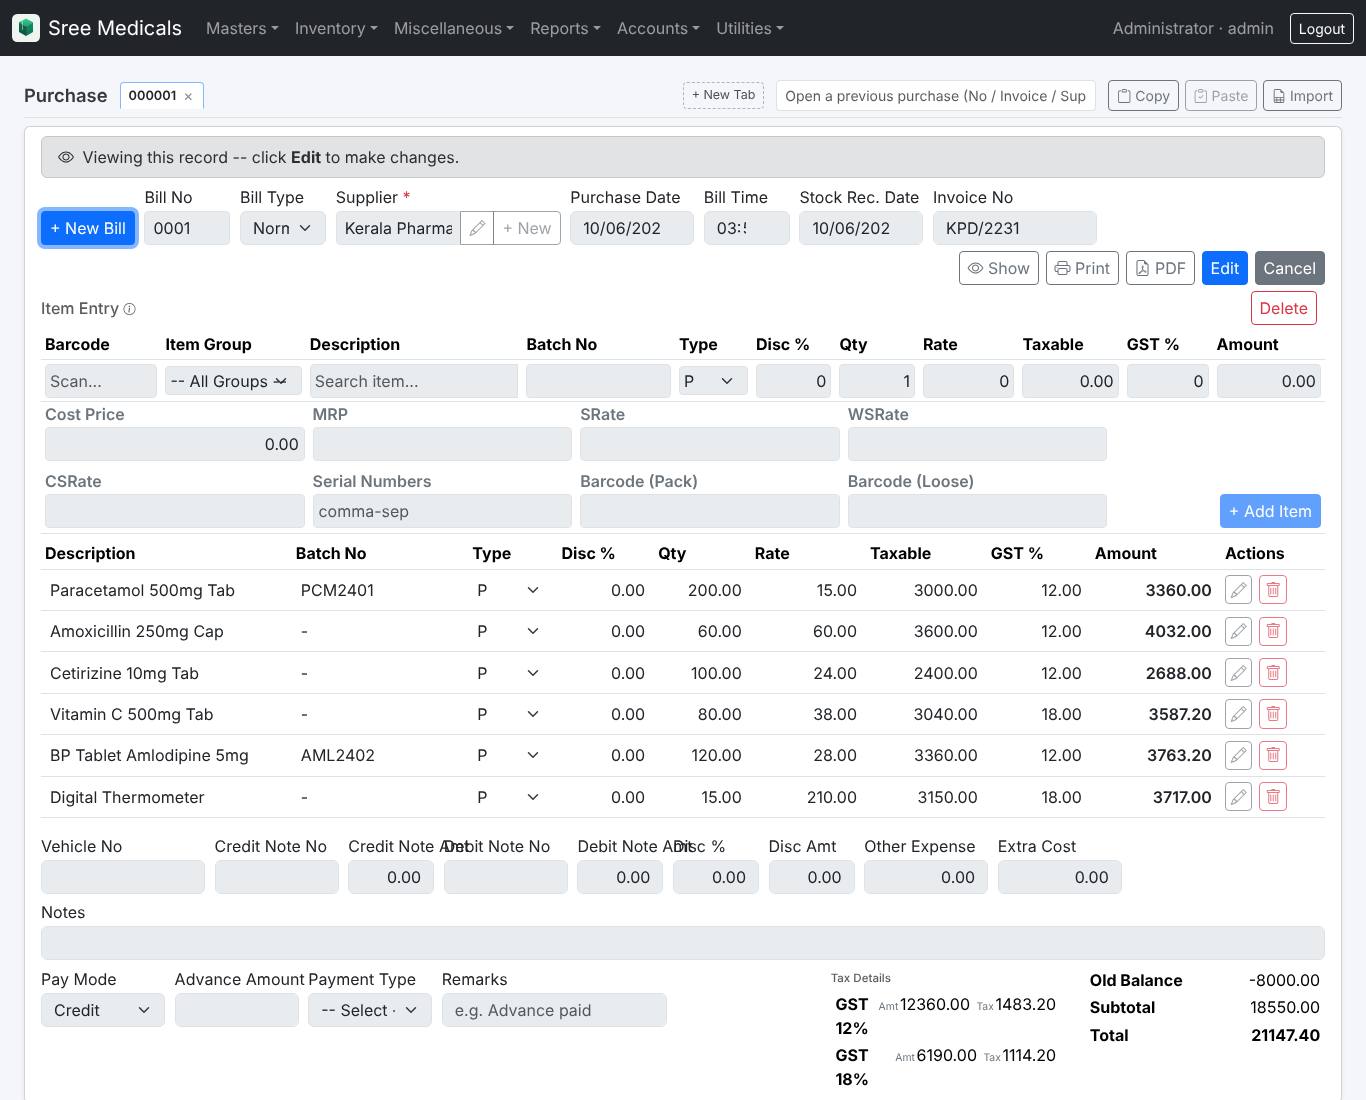
- Import (top bar): copy the supplier's invoice lines from Excel, click Paste, check the preview (unmatched rows show in red with a fix button) and click Import. Then save the purchase as usual.
- After saving, each line has a Print Sticker button for barcode labels (when Barcode Print Settings is on). More stickers later: Inventory → Barcode Reprint.
- F1 in the item box opens that item's rates for quick changes; F7 edits the item itself.
6. Other bills and stock entries
Sales Quotation
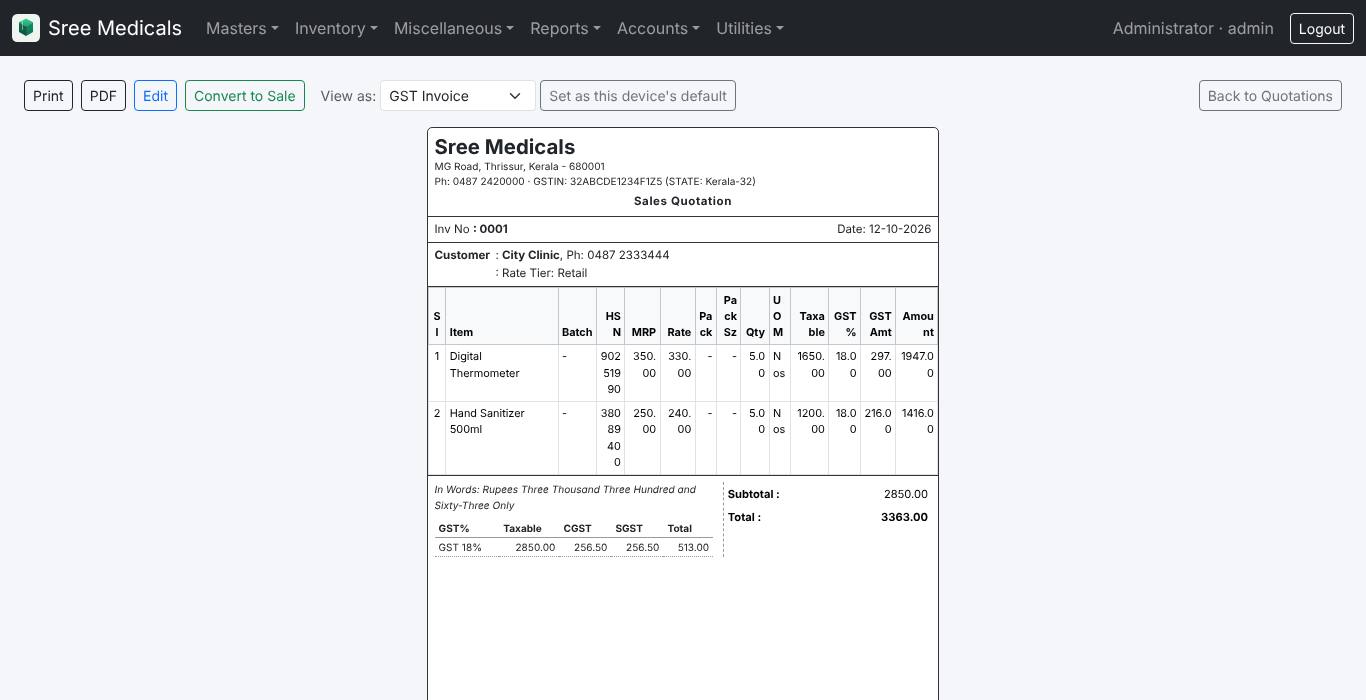
Inventory → + Sales Quotation Entry works like a Sale but does not touch stock or accounts. When the customer agrees, open the quotation and click Convert to Sale; a new Sale opens filled in from it.
Customer Orders (bookings)
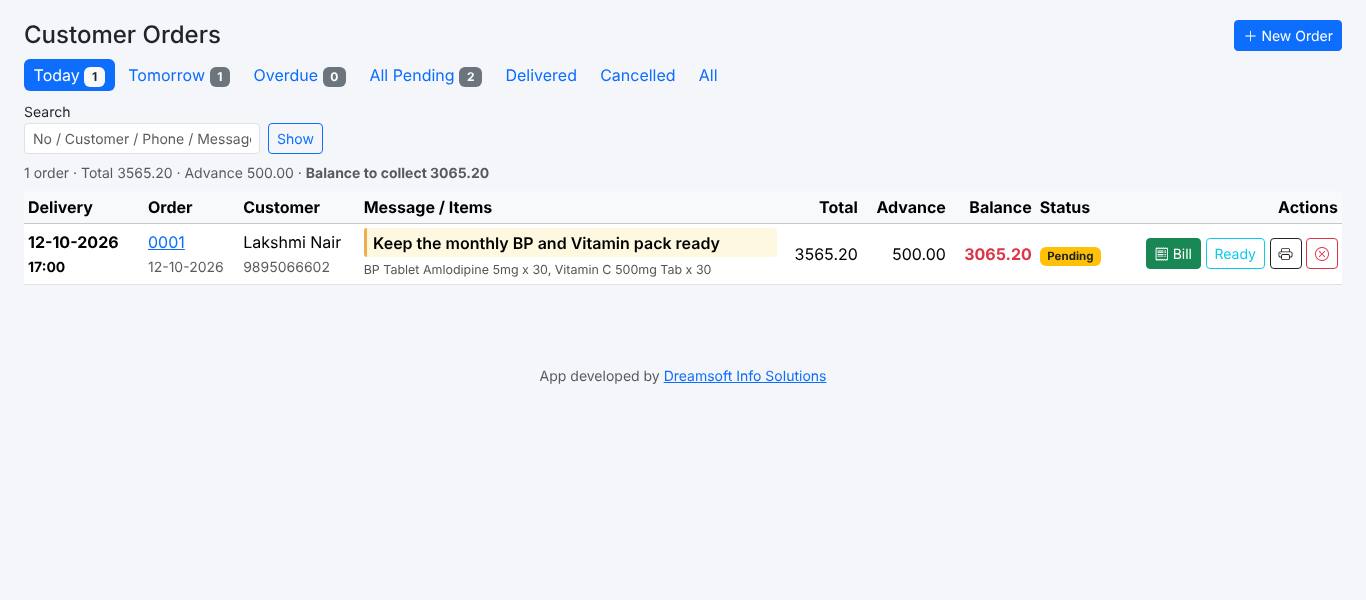
For goods booked in advance (a cake, a special medicine, a monthly pack). Inventory → + Customer Order Entry: enter the customer, items, Delivery Date/Time, a Message and any advance received. The order does not touch stock until it is billed.
- Inventory → Customer Orders shows tabs Today, Tomorrow, Overdue and All Pending, with the message highlighted.
- Bill opens a Sale filled in from the order with the advance already deducted; collect only the balance.
- Cancel asks whether to refund the advance or keep it.
Sales Return and Purchase Return
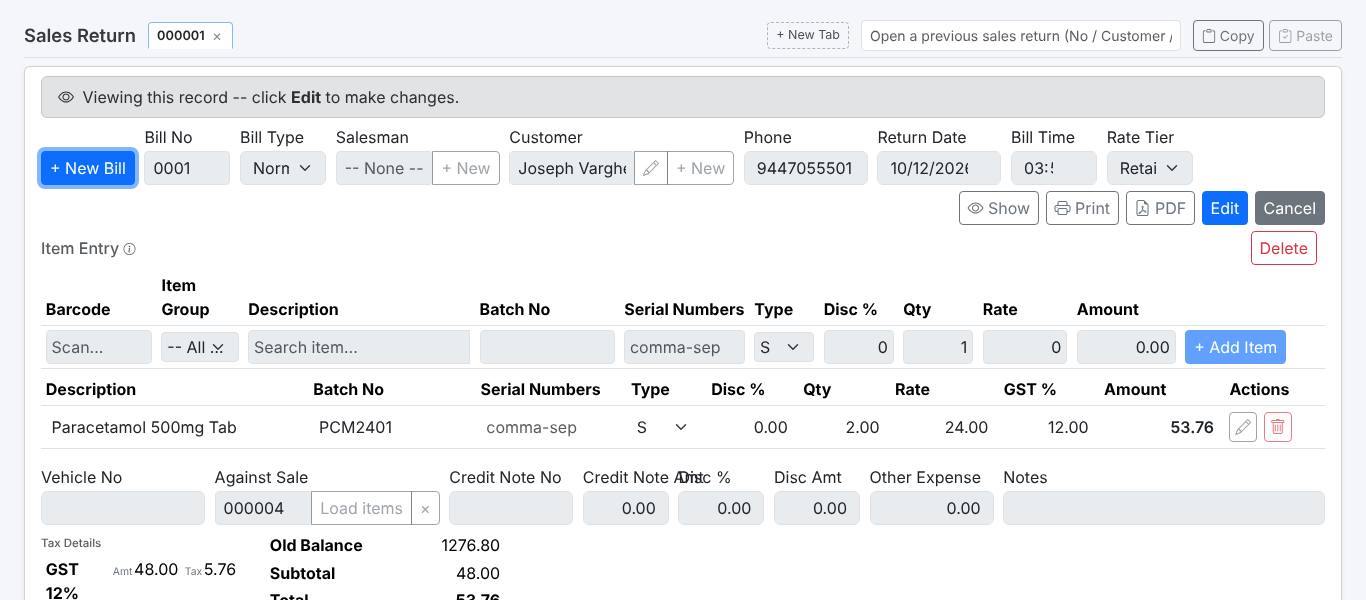
- Inventory → + Sales Return Entry: pick Against Sale and click Load items to bring in that bill's items, then keep only what came back. Stock is added back and the customer is credited.
- Inventory → + Purchase Return Entry: goods sent back to the supplier, with Against Purchase No.
Stock Transfer Out / In (branches)
Move stock between your own branches. Stock Transfer Out reduces stock here; the branch records a Stock Transfer In. Branches are added in Masters → Branches.
Packing Entry (making products)
When Product Stock is set to Product Entry, Inventory → + Packing Entry adds stock of a product you make or pack and takes away its raw items, using Masters → Item Product Relation. With Product Direct, selling a product reduces its raw items automatically.
Purchase ordering
- Reorder Suggestions: items below minimum quantity and fast-moving items, with suggested quantities.
- Order List: items to order, grouped by supplier. On a Sale, F9 adds the current item to this list.
- Purchase Orders: create one order per supplier, send by WhatsApp, then Receive goods to open a Purchase already filled in. Part deliveries are tracked.
- Item Suppliers: which supplier gave the best rate for each item.
E-Invoice and E-Way Bill
For GST-registered companies with this switched on: each bill's print page has an E-Invoice / E-Way button, and Inventory → E-Invoice / E-Way Bill lists all bills with bulk JSON download for the government portal. A bill with an active IRN cannot be edited or deleted.
Weigh scale items
When a weigh scale is used, barcodes printed by the scale are read on Sale with the weight as quantity. Inventory → Weigh Scale Items lets you update rates and write the scale's PLU file.
7. Payments and receipts
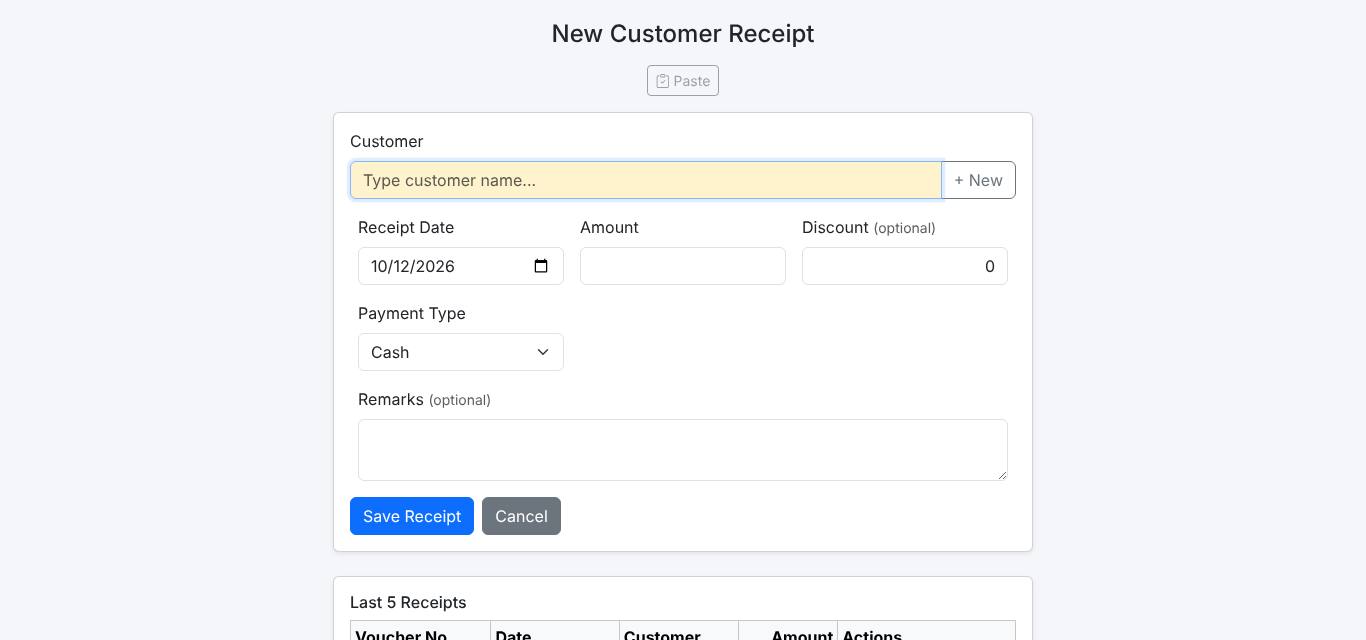
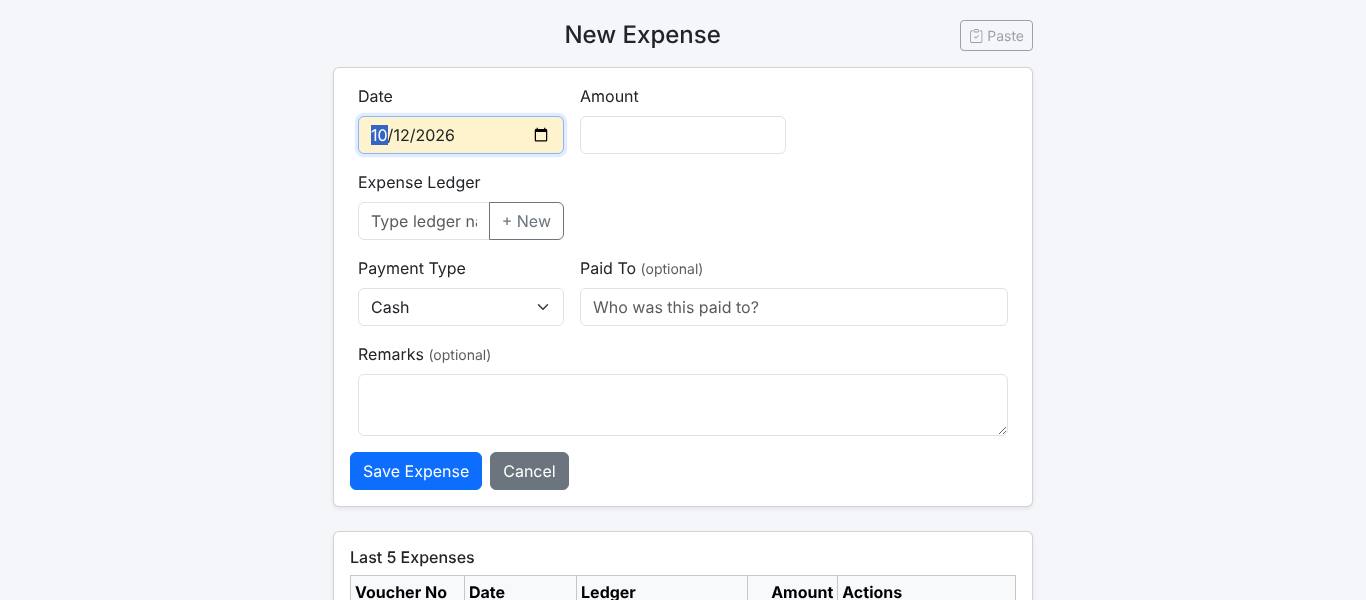
All are under Miscellaneous → Payments & Receipts. Each form shows the last few entries below it, with Edit and Print.
| Entry | Use it when |
|---|---|
| Customer Receipts | A customer pays an old balance. Optionally apply it against particular bills; anything not applied stays as an advance. |
| Supplier Payments | You pay a supplier. Discount and cheque details can be entered; it can be applied against purchase bills. |
| Branch Receipts | A branch pays for stock transferred to it. |
| Supplier Credit Notes / Customer Debit Notes | Adjust a party's balance without cash (for example rate difference). |
| Staff Payments / Staff Salary Journal | Pay staff, and post the month's salaries in one go. |
| Other Payment | Expenses such as rent, electricity, transport (choose the Ledger). |
| Other Receipt | Other income such as commission or rent received. |
| Asset Purchase | Buying furniture, computers or other fixed assets. |
| Loan Borrowed / Loan Repayment | Money borrowed, and repayments split into principal and interest. |
| Cash/Bank Transfer | Cash deposited in the bank, cash withdrawn, UPI to bank, and so on. |
| Journal Entry | Any adjustment between ledgers (debits must equal credits). For accountants. |
8. Salesmen and the Salesman Portal
When Salesman is switched on in Inventory Settings, a Salesman can be chosen on each bill, and salesmen can collect money from customers.
- Miscellaneous → Salesman Collection → Collect Payment: money collected by a salesman. It stays with the salesman (it is not yet company cash).
- Salesman Handover: one salesman gives collected cash to another.
- Salesman Remit to Company: the salesman hands the cash in; only now does it reach the Cash Book.
- Salesman Statement (Reports → Statements) shows what each salesman holds.
Salesman Portal: a salesman logs in with the same App Code and their own username (set in Masters → Salesmen). They see only My Customers (balances due, bills, statement, collect payment) and My Cash Statement.
9. Masters (Admin)
Masters are the lists everything else uses. Each Add page shows the last 5 records with Edit and Delete, and a quick search box.
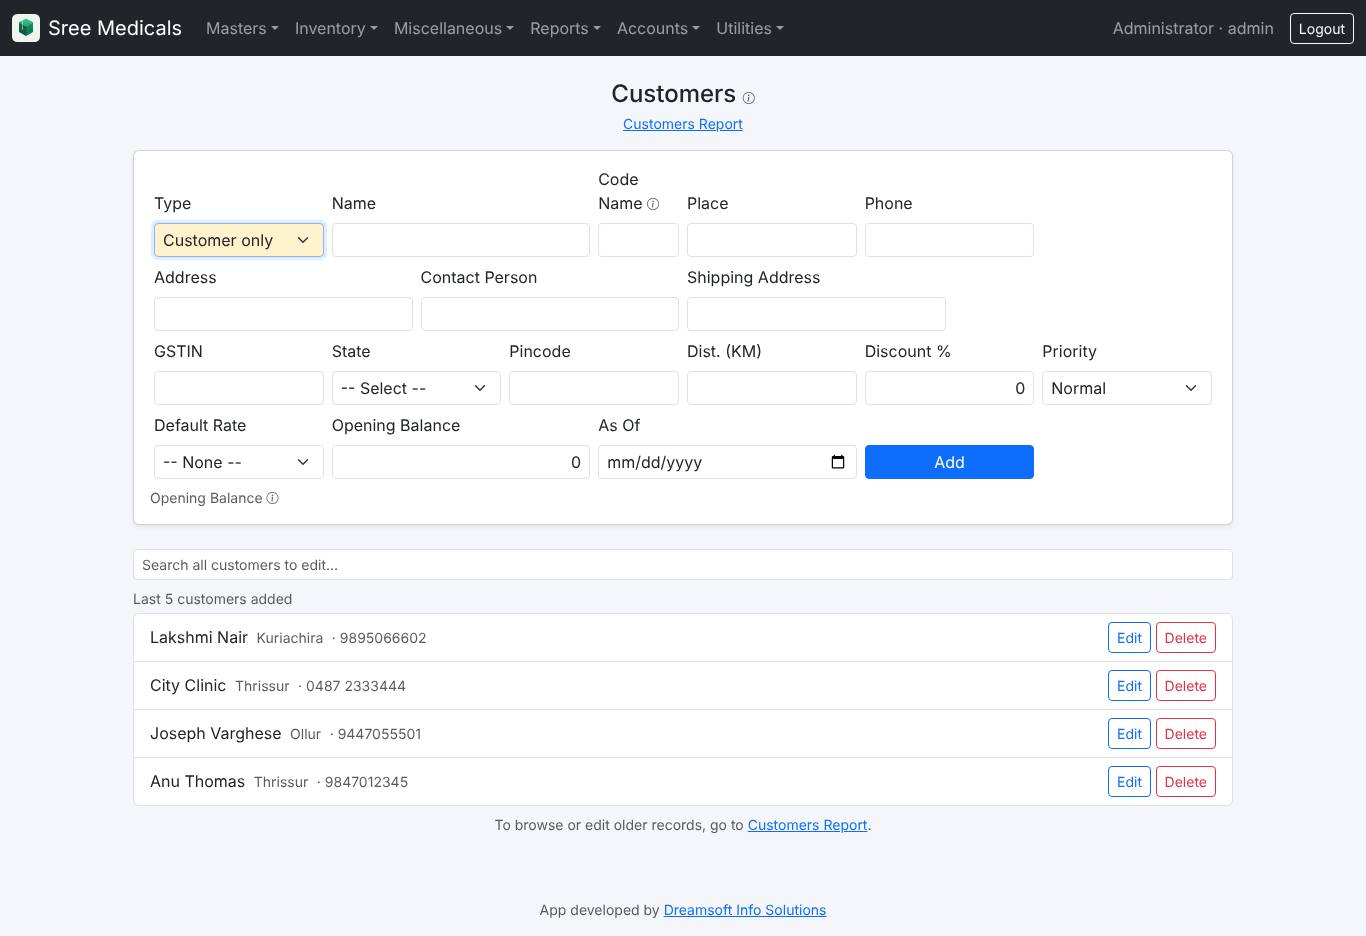
Customers, Suppliers and Branches
One list of parties. Type can be Customer only, Supplier only, Both, or Branch. Fill name, phone, address, GSTIN, state, opening balance, default rate tier and discount. For customers you can also keep a Customer Item List (on the customer's edit page) and see their Loyalty Points.
Items
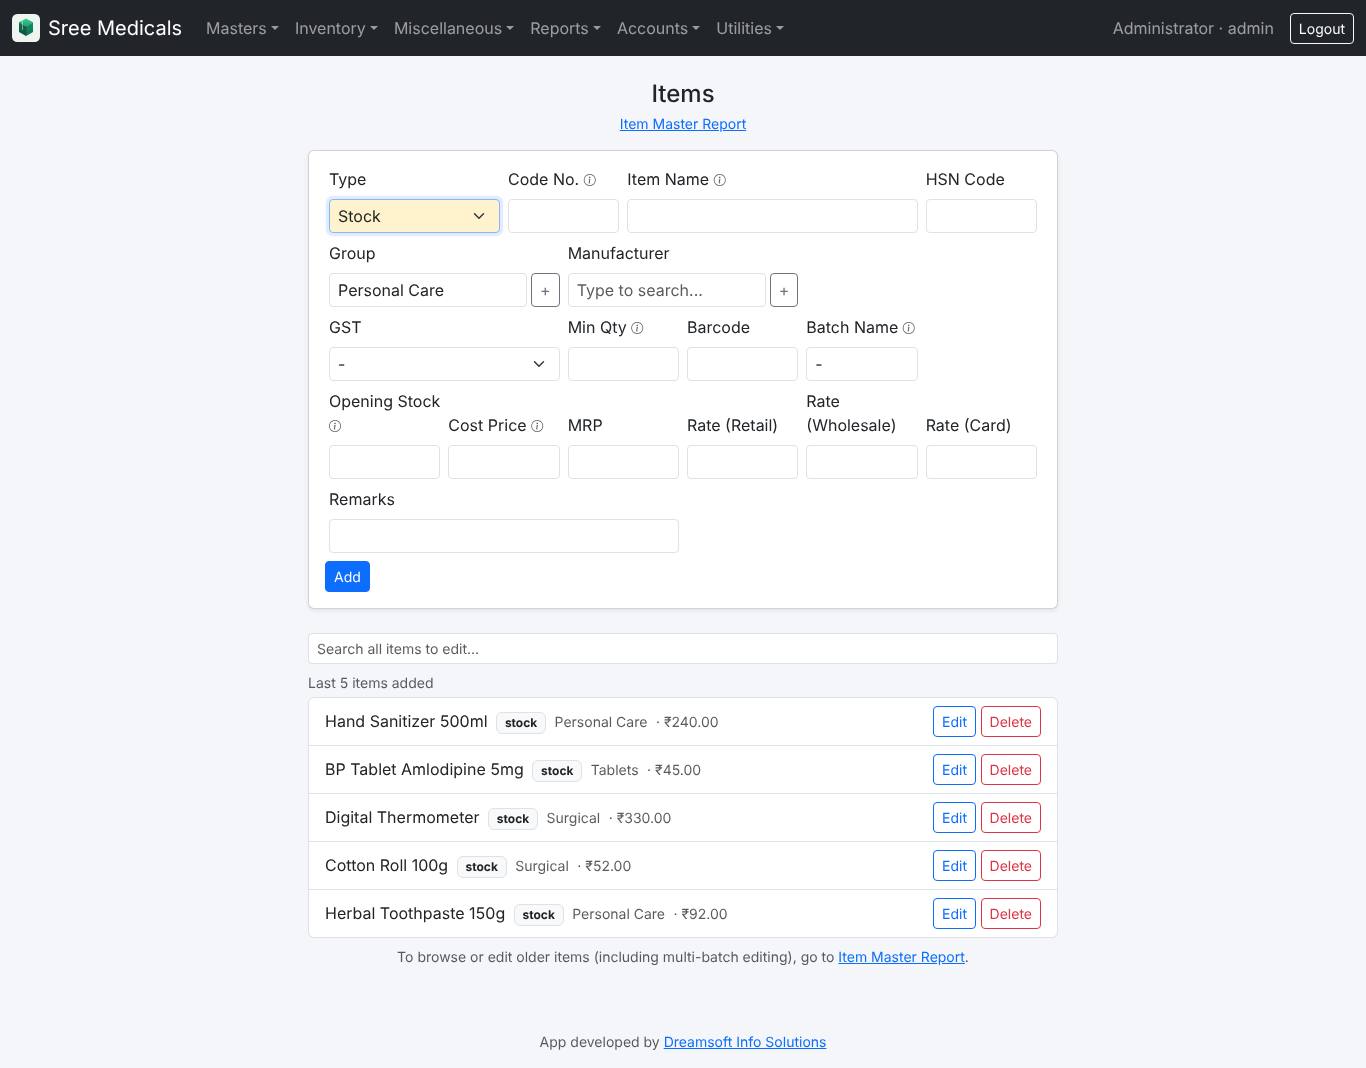
Each item has a type (Stock, Service or Product), name, code, HSN, group, manufacturer, GST rate, pack quantity and units (pack/loose), barcode, minimum quantity, opening stock, cost price, MRP and sale rates (Retail, Wholesale, Card), and a minimum Below Rate if needed. Which fields appear is decided by your software provider.
Other masters
- Item Groups, Manufacturers, Racks, Tax Rates: used to classify items and to filter reports.
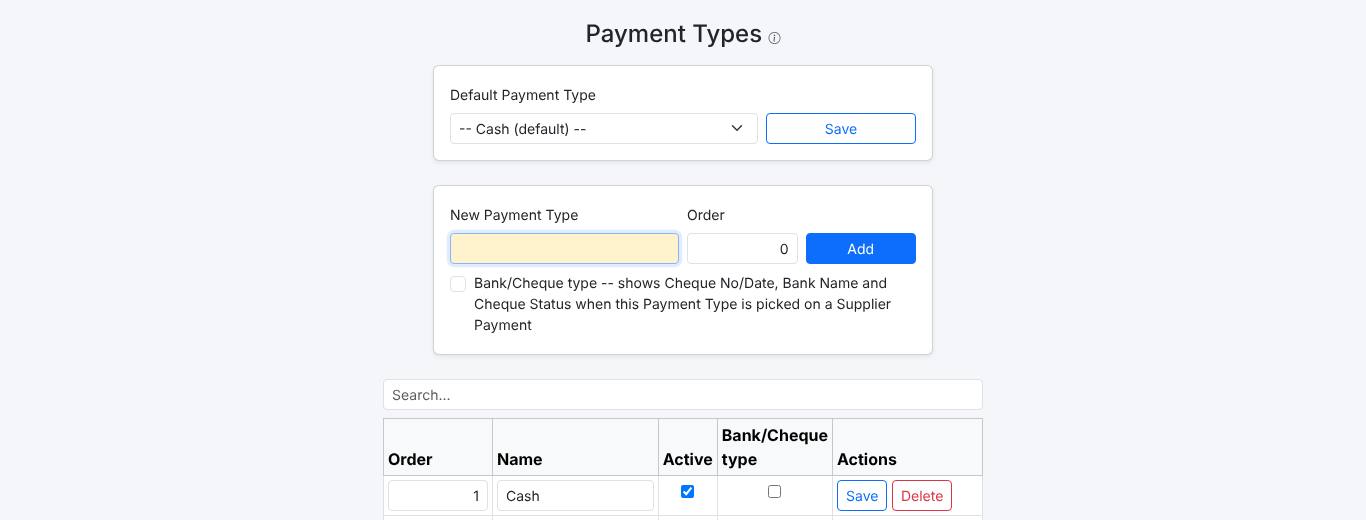
- Payment Types: Cash, UPI, bank accounts. Mark bank/cheque types, and choose the Default Payment Type (its book is the Cash Book).
- Opening Balances: cash and bank balances on the day you start.
- Ledgers and Account Groups: expense and income heads for Other Payment / Other Receipt. Built-in groups can't be deleted.
- Salesmen, Staff (with salary), Routes, Loan Accounts.
While entering a bill, F2 creates a new item, customer, supplier or salesman, and F7 edits the one already picked, without leaving the bill.
Changing many items at once
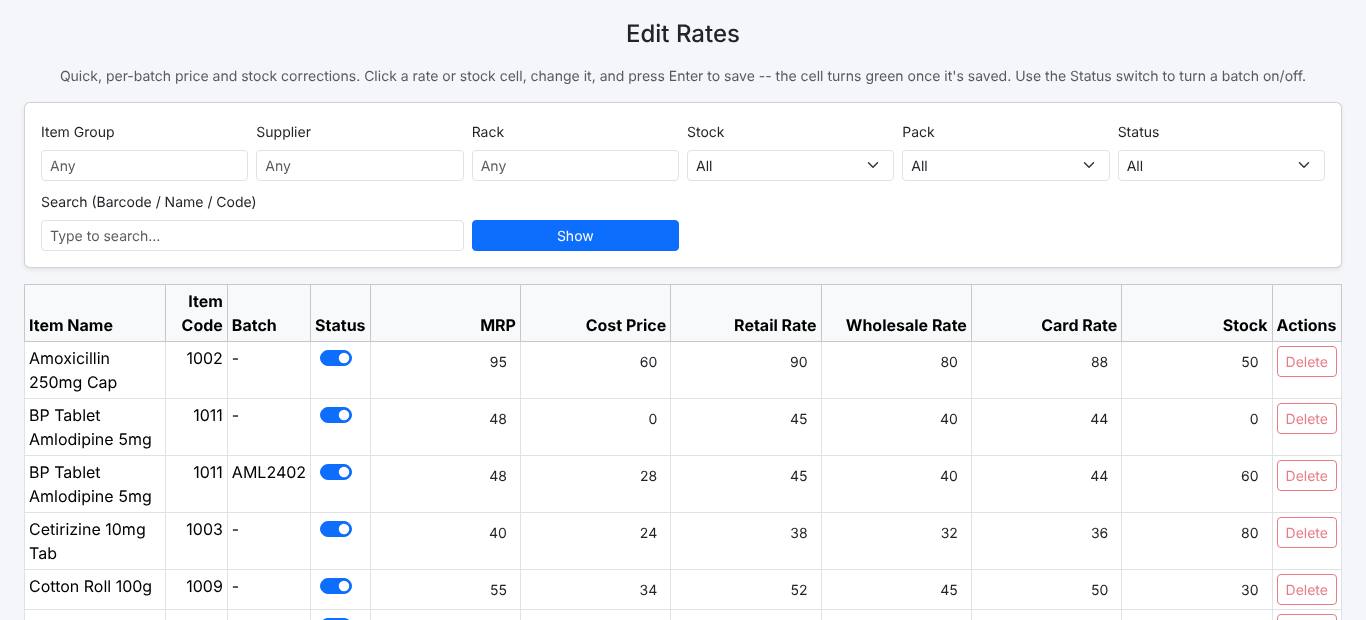
Miscellaneous → Edit Rates and Edit Items show items in a grid. Filter, click Show, click a cell, change the value and press Enter; the cell turns green when saved. Edit Rates can also switch a batch off, correct stock and delete an unused batch.
10. Reports
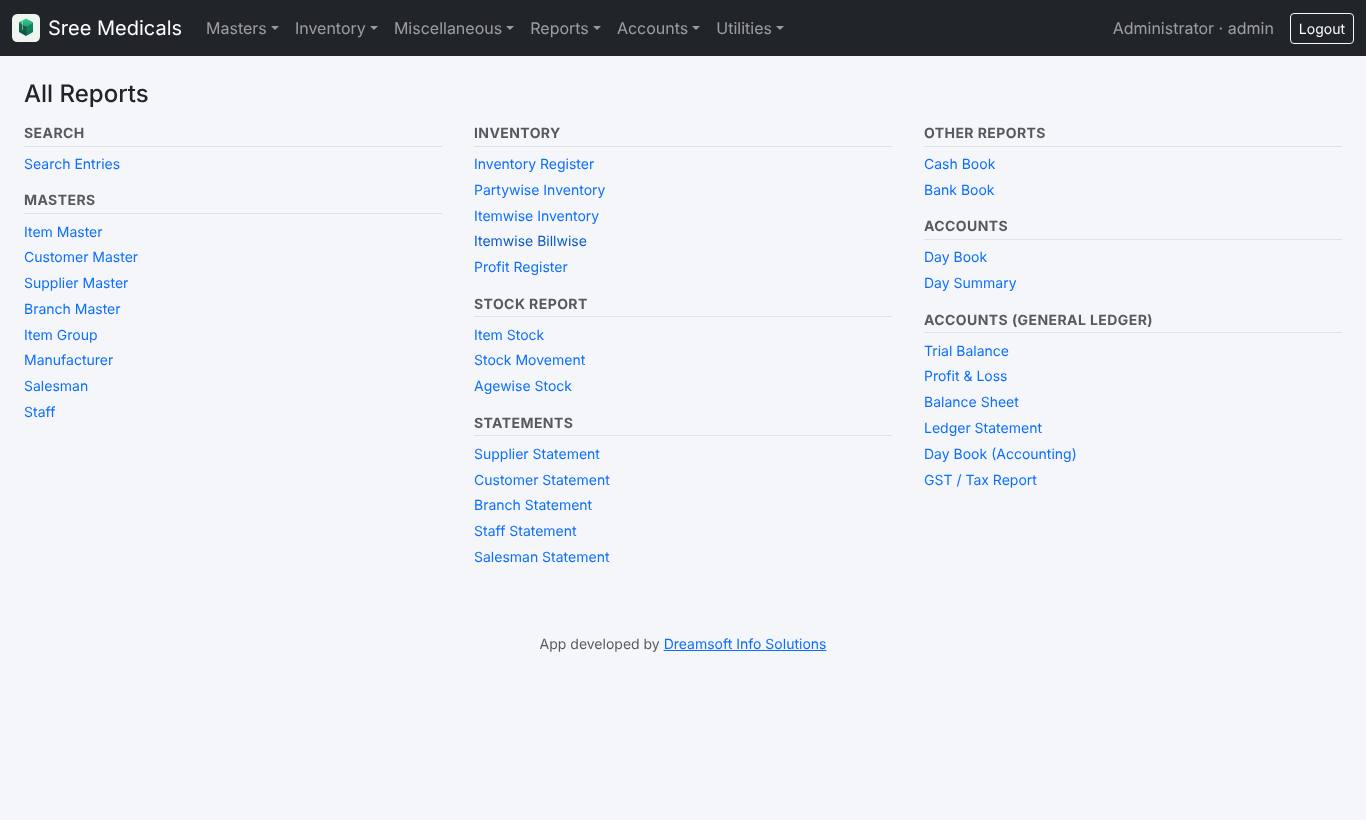
Reports → All Reports lists every report on one page.
How every report works
- Choose the filters (dates default to today) and click Show. Nothing loads until you click Show.
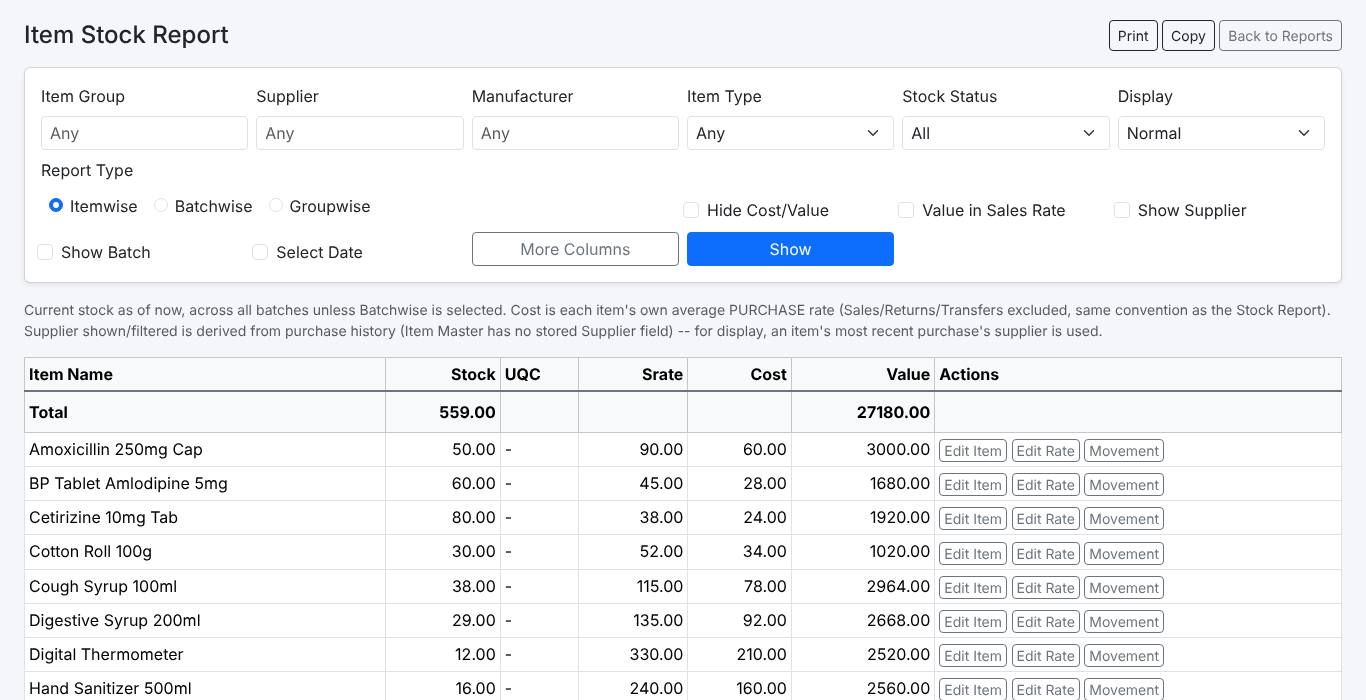
- The Total row is repeated at the top of the table so you see it straight away.
- Copy copies the table to paste into Excel; Print prints it with the company heading.
- Filter boxes are type-to-search: type a few letters, then ↓ and Enter.
- Click a bill or voucher number to open it (locked).
Main reports
| Report | Shows |
|---|---|
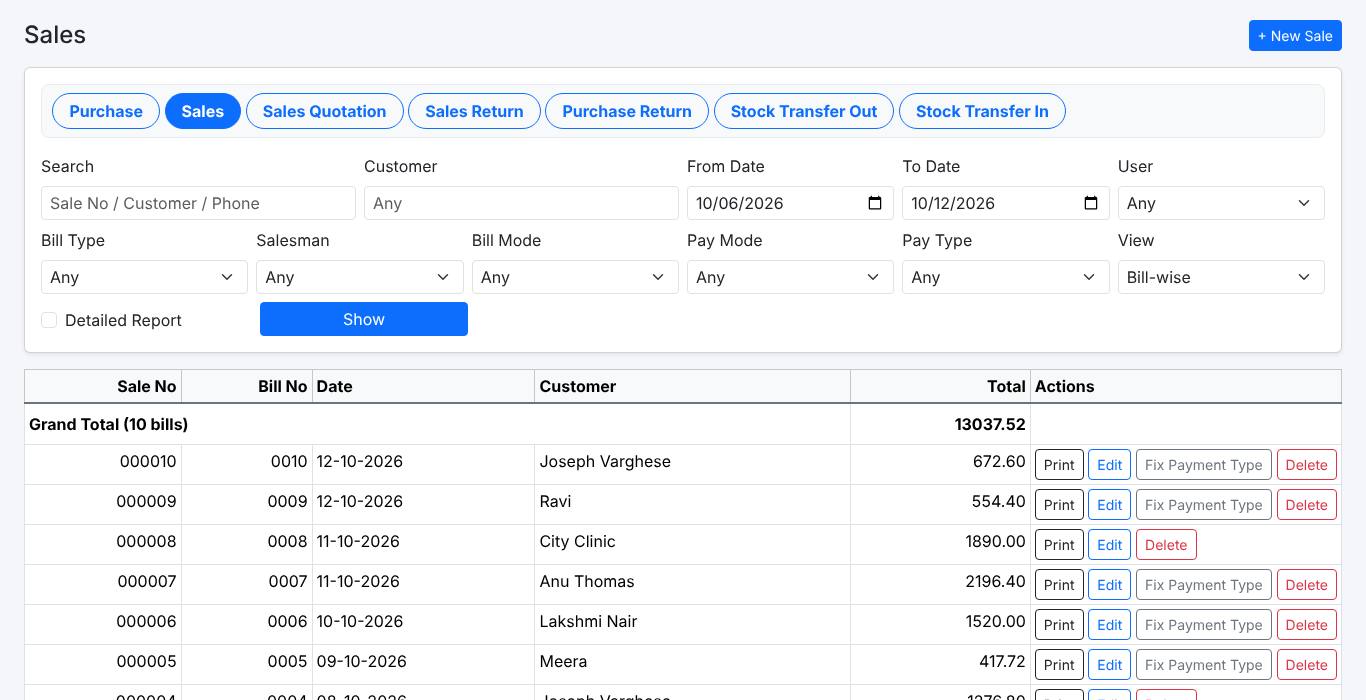
| Inventory Register | All bills of a type (sales, purchases, returns…) with totals; open, print or edit from here. |
| Partywise / Itemwise Inventory | Totals per customer/supplier, or per item. |
| Itemwise Billwise | Every line of every bill: find which bill a batch or serial number went to. |
| Profit Register | Profit per bill or per item, at average purchase cost. |
| Item Stock / Stock Movement / Agewise Stock | Current stock with value; an item's in-and-out history; how old the stock is. |
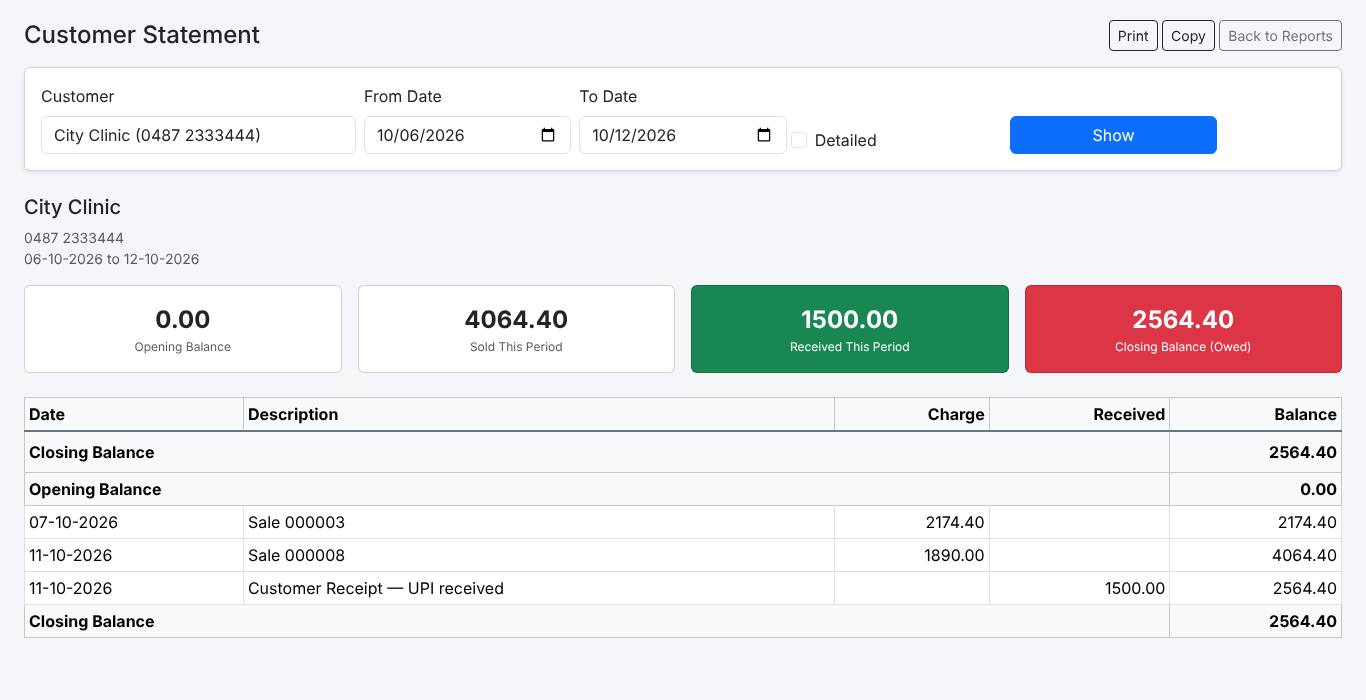
| Customer / Supplier / Branch / Salesman / Staff Statement | Running balance of one party, ready to print or send. |
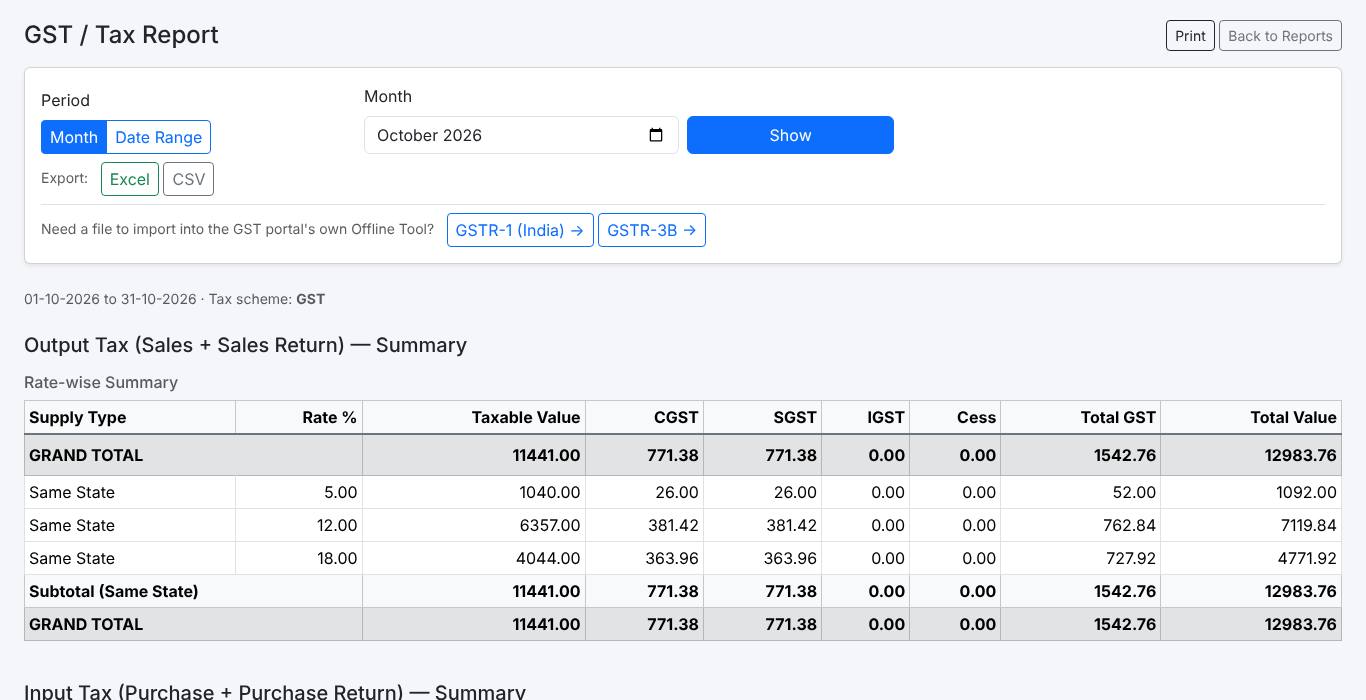
| GST / Tax Report | Sales and purchase tax summary, GSTR-1 (with JSON export), GSTR-3B, and composition returns. |
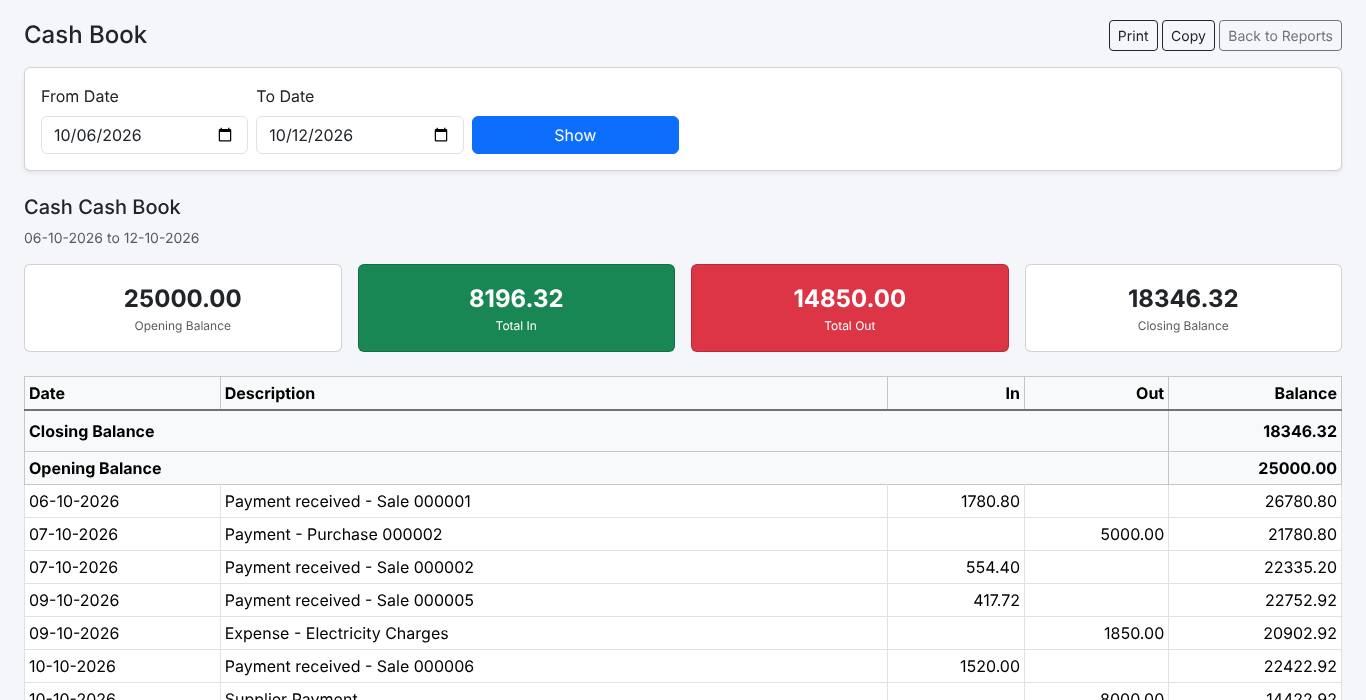
| Cash Book / Bank Book | Money in and out of cash and of each bank/UPI account, with running balance. |
| Loyalty Points | Points earned, used and balance for each customer, with history. |
Search Entries
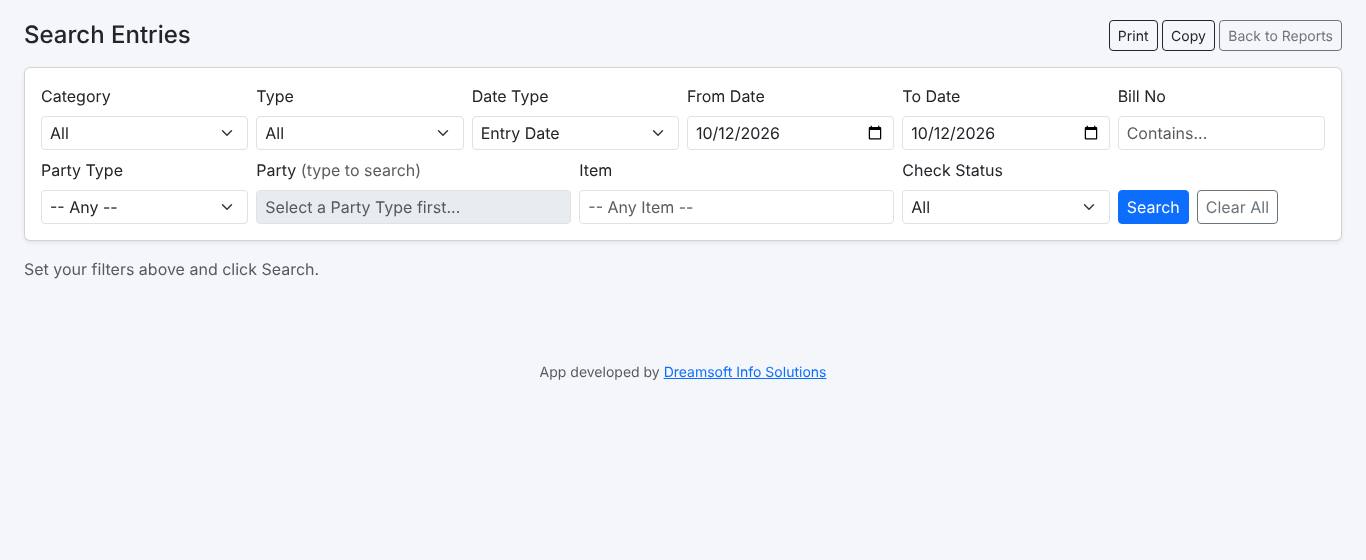
Miscellaneous → Search Entries searches every kind of entry at once by number, party, amount or date, so you can find any bill quickly. Quick Item Search (F3 in an item box) shows an item's stock and rates.
11. Accounts
Every bill and voucher is posted to the accounts automatically. You don't need to make journal entries for normal work.
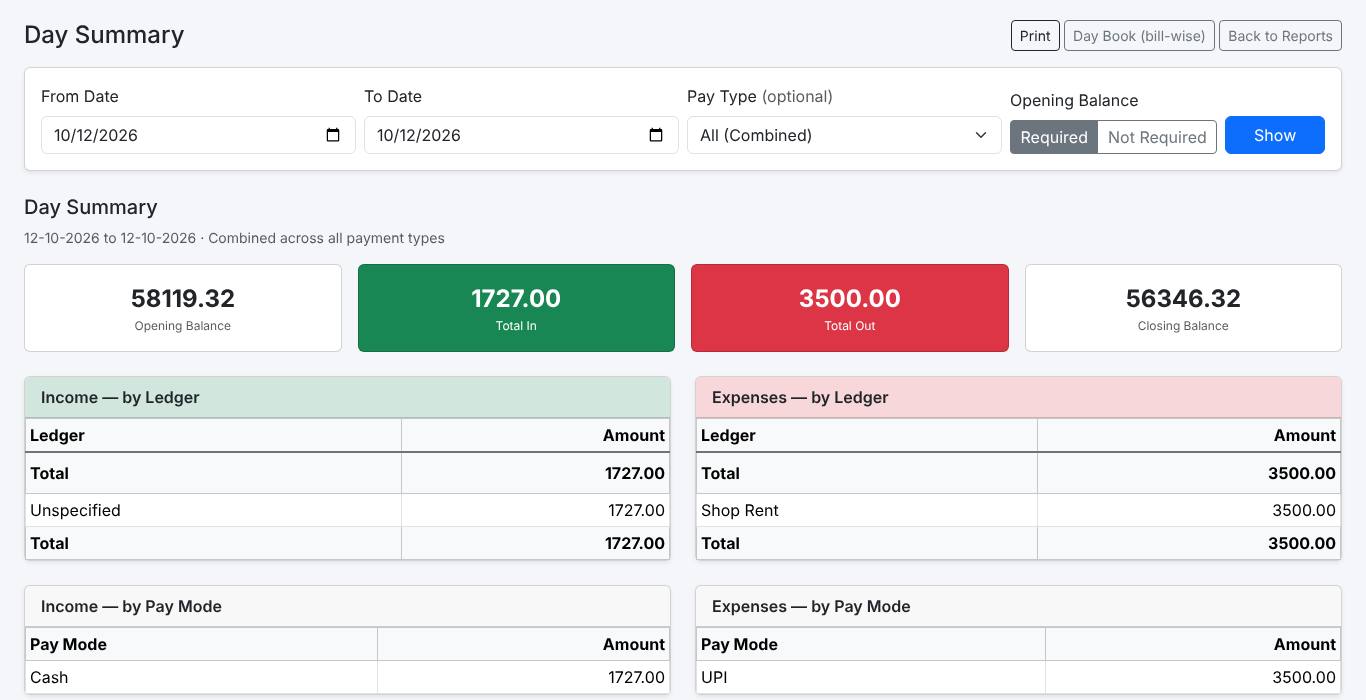
- Day Book and Day Summary: everything entered on a day, and the day's totals by payment type. Good for closing the counter.
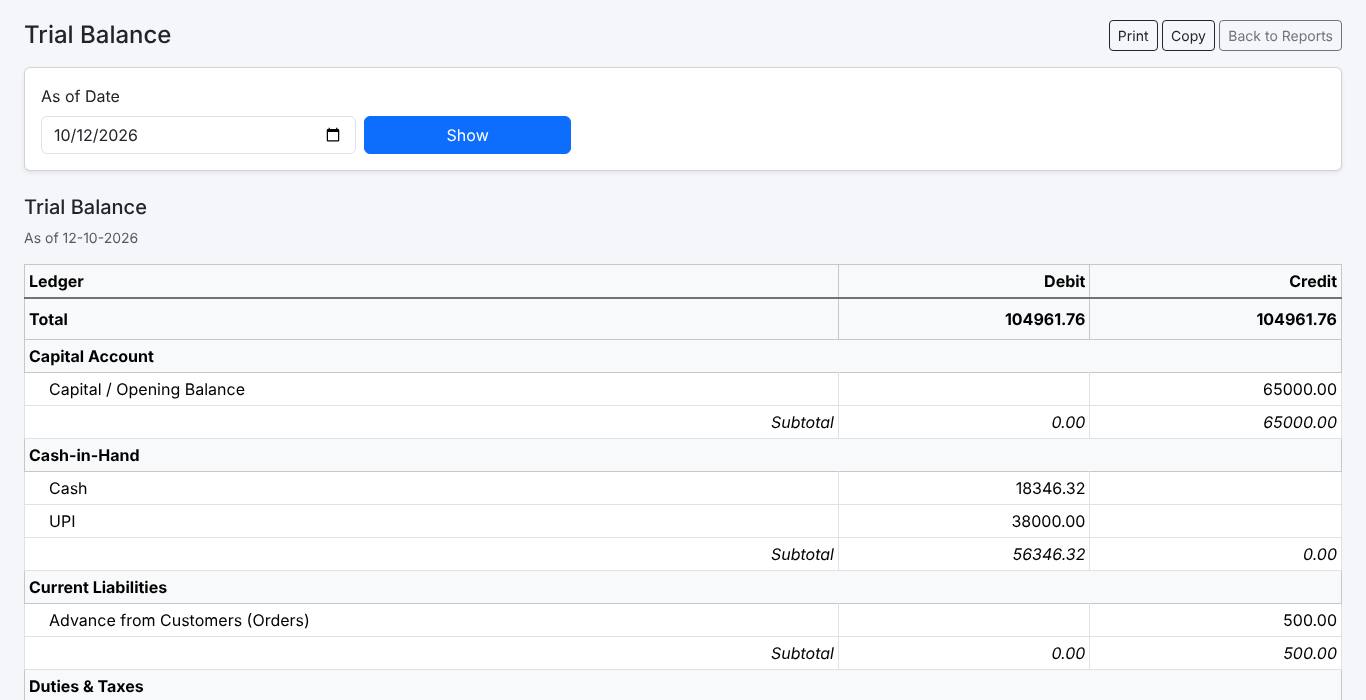
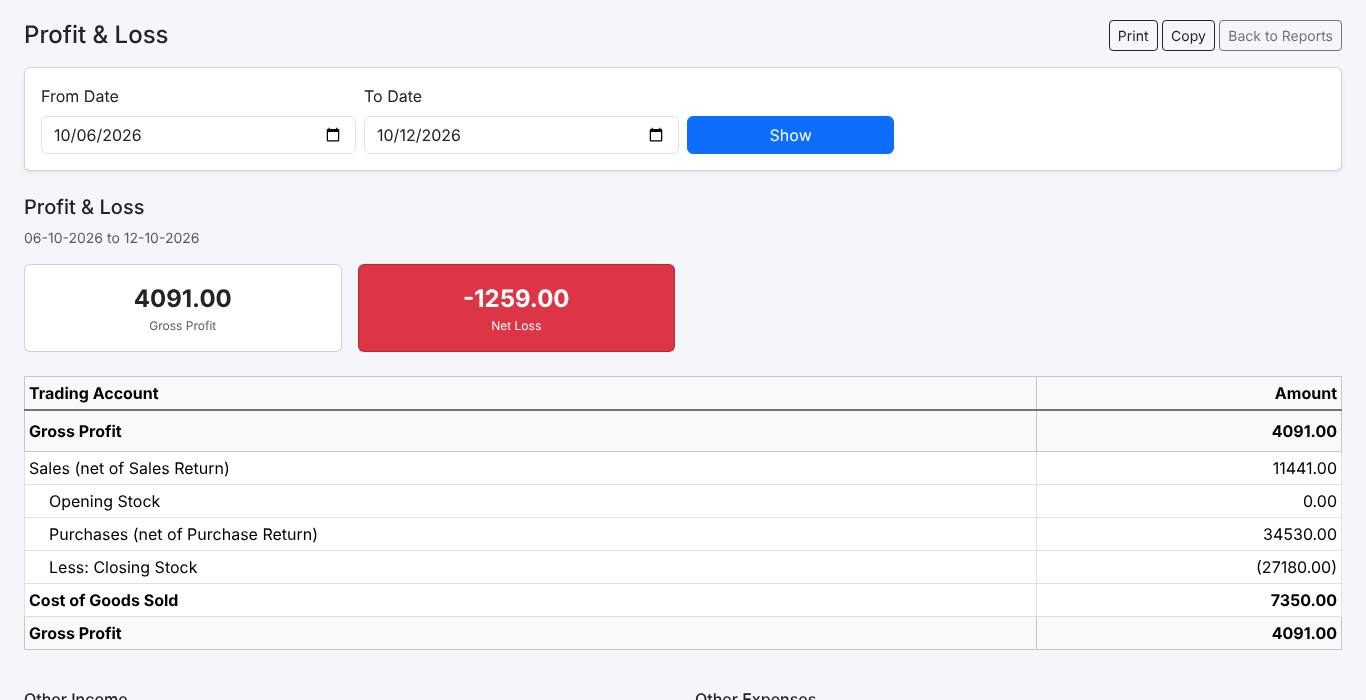
- Trial Balance, Profit & Loss, Balance Sheet: the standard statements for any period.
- Ledger Statement: the account of any ledger (a customer, an expense, a bank…).
- Day Book (Accounting): the full debit/credit journal.
- The financial year closes automatically; Miscellaneous → Financial Years shows the closed years.
12. Settings (Admin)
Settings
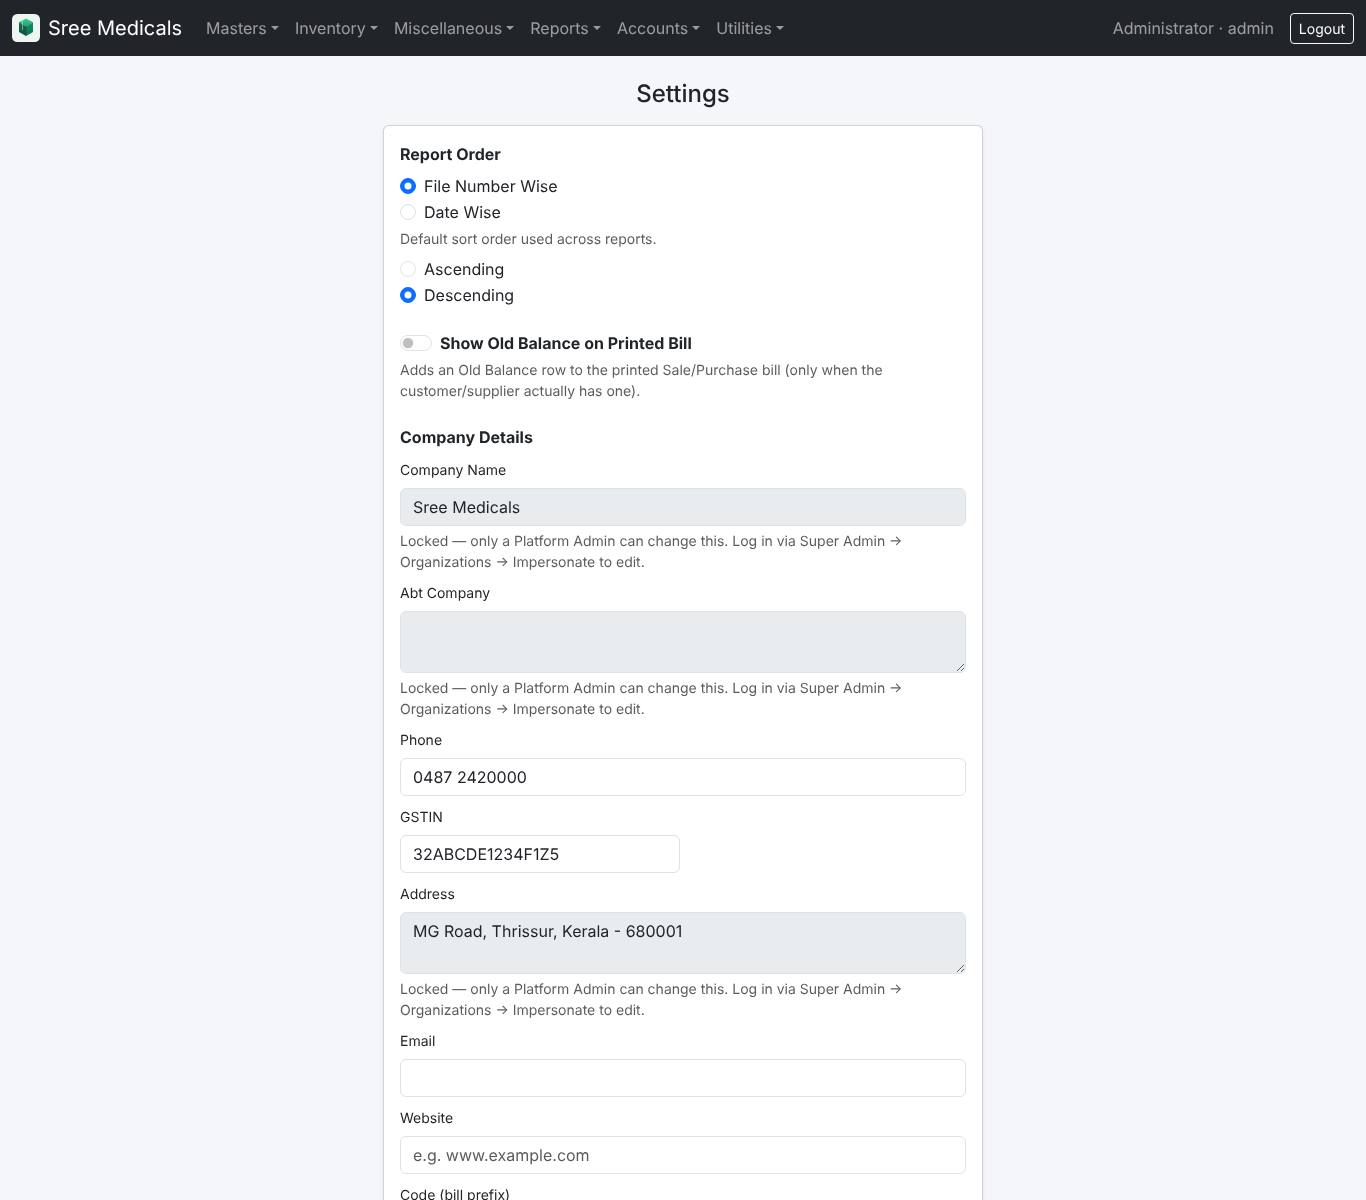
Utilities → Settings: tax type and GST scheme, company state, bank details for the bill, currency, where the Delete button shows, whether old balance prints on bills, a Login PIN and a message shown after login. Company name, about line and address are set by your software provider.
Inventory Settings
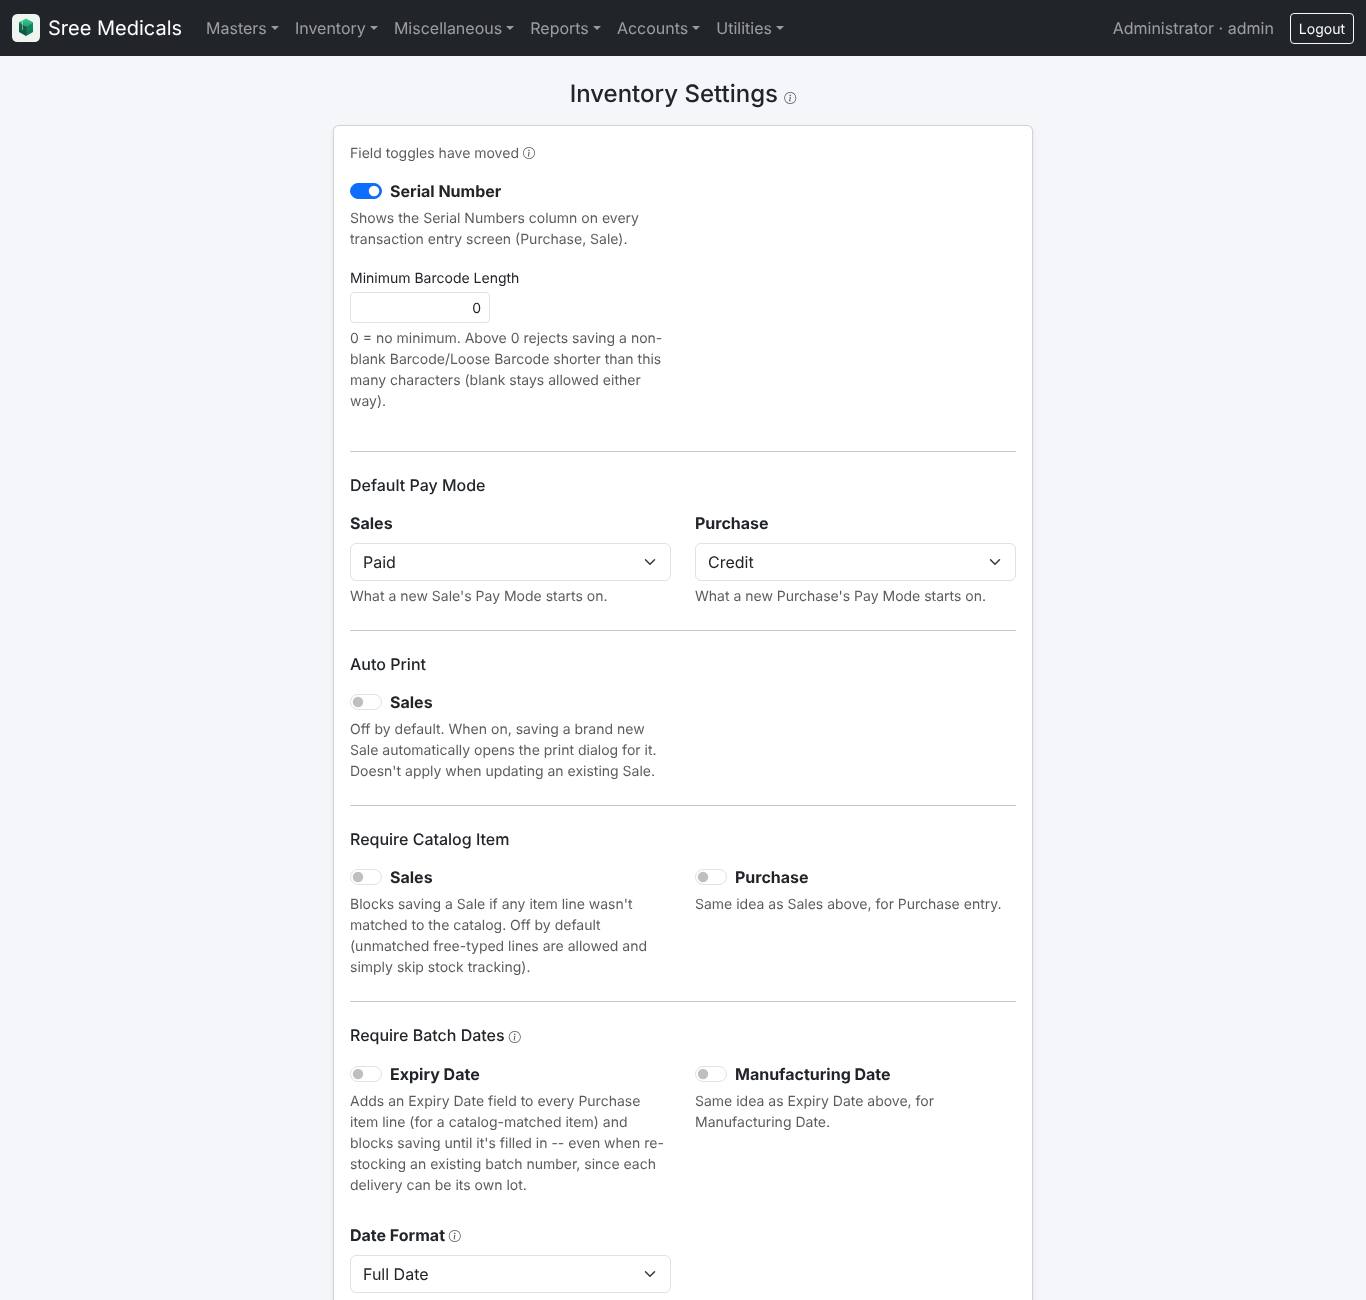
The main switches for how billing works:
- Default Pay Mode (Paid or Credit), Auto Print after saving a sale.
- Batch options: expiry and manufacturing dates, date format, batch order.
- Item Entry Type: Manual (stop on quantity) or Direct (scan and go).
- Negative Stock: Block, Confirm or Allow.
- Club Items: the same item scanned twice becomes one line.
- Features: Customer Orders, Customer Item Lists, Loyalty Points (point system, percentage, saved customers only or everyone), Salesman, Credit/Debit Notes, Product Stock, bill-wise receipts and payments.
- Which columns show in Item Entry and Added Items, and their order.
Bill Print Settings
Choose the invoice style and which styles staff may switch to, logo, header fields, item columns and their order, MRP total, footer text (bank details, terms, declaration), signatory, caption and font size, page size (A4/A5, portrait/landscape, half page), and section colours. The UPI QR code is set by your software provider.
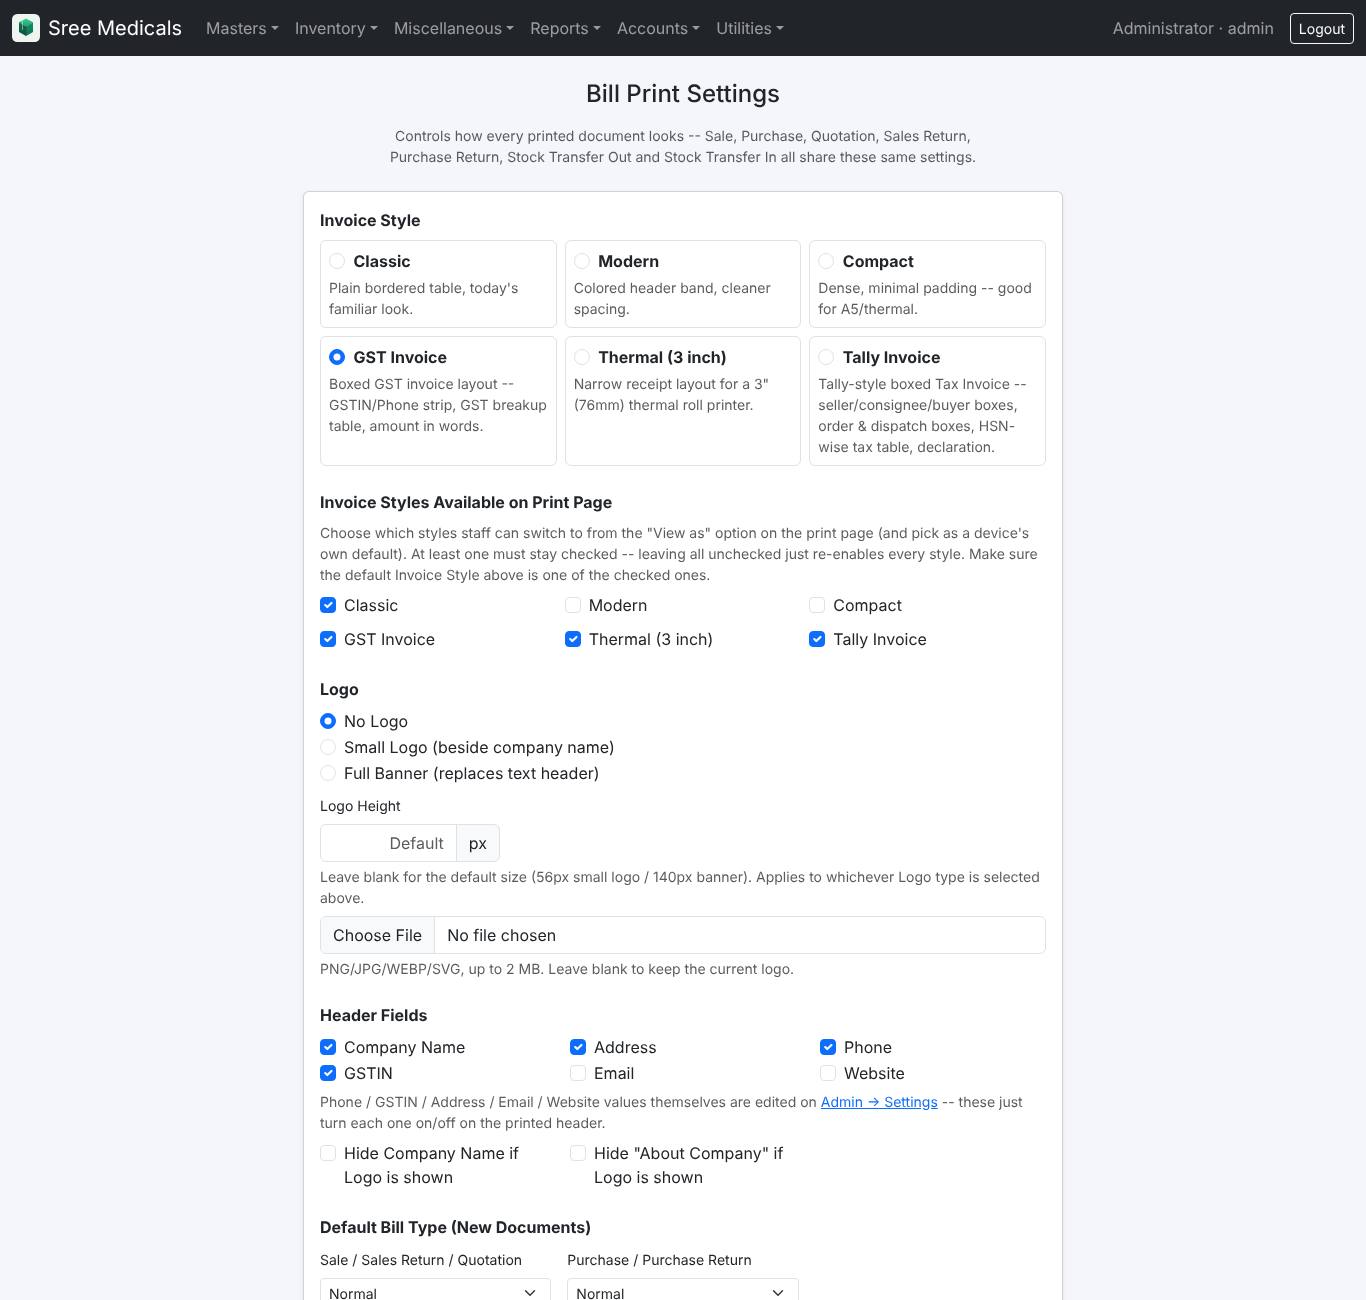
For printing without the print dialog every time, start Chrome with the --kiosk-printing option (your software provider can set this shortcut up).
Other utilities
- Custom Fields: add your own text fields to any bill type and choose whether they print.
- Barcode Print Settings: label size and a drag-and-drop label designer.
- Weigh Scale Settings, E-Invoice & E-Way Bill Settings.
- Theme: colours of sections, the highlight colour of the box you are typing in, and font sizes.
- Miscellaneous → Numbering Settings: bill number prefix, format and financial year start.
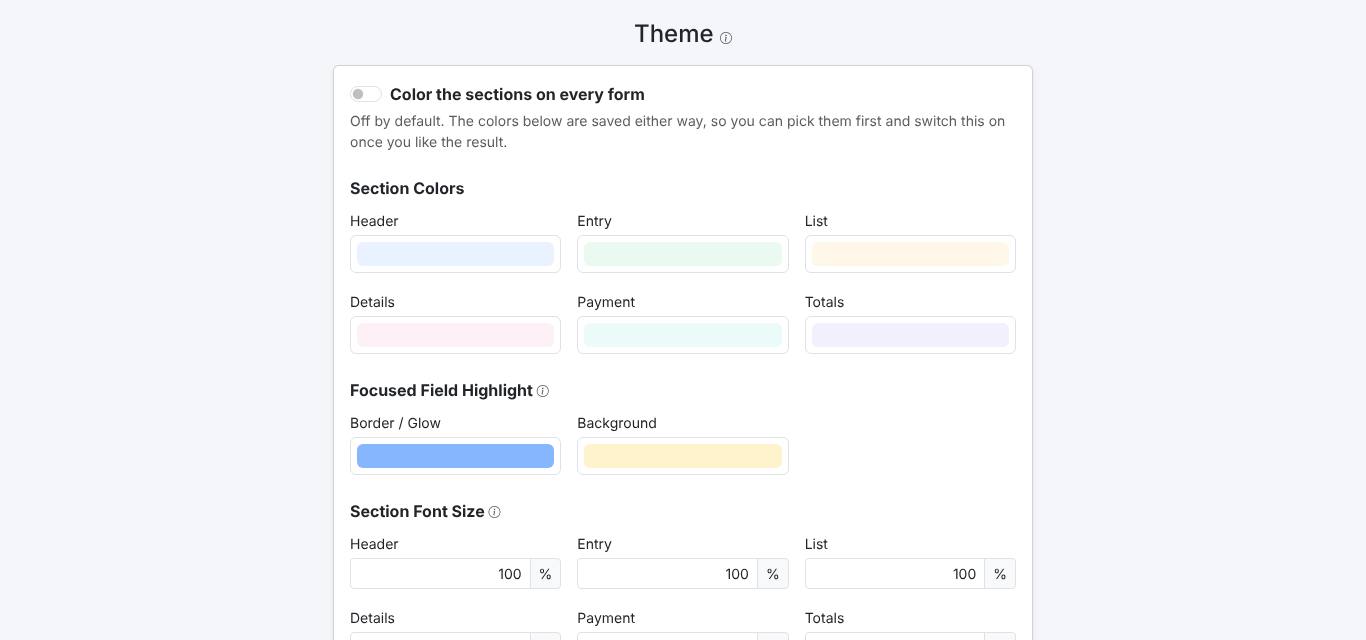
13. Users and permissions (Admin)
- Utilities → Users: Add User with username, password, full name and role. Each user has Active, Reset (password) and Save.
- Utilities → User Control: for Subadmin, User and Report Only, choose which forms can be edited, the edit window in days (blank = no limit, 0 = same day only), whether cost price is hidden, whether F7/F1 master editing is allowed, and which reports are blocked.
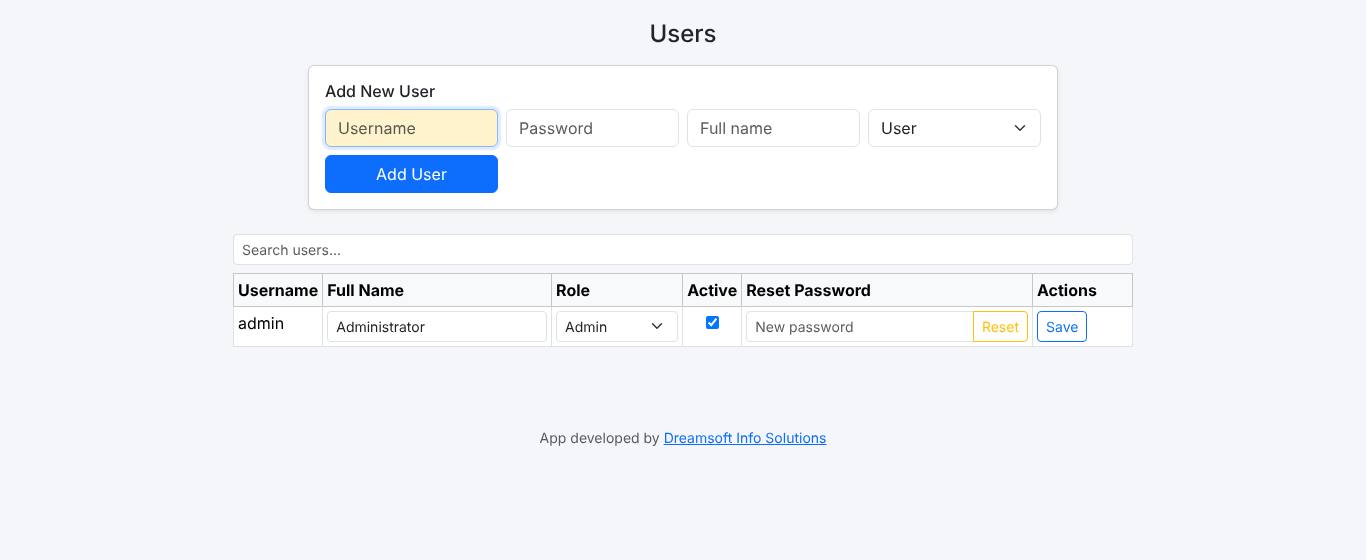
14. Keyboard shortcuts
| Key | What it does |
|---|---|
| Enter | Move to the next box. On Sale, Enter in Qty adds the line when the rate is filled. |
| ↓ ↑ then Enter | Move through a drop-down list and pick. Esc closes it. |
| F2 | Create a new item, customer, supplier or salesman from its box. |
| F7 | Edit the item, customer or supplier already picked. |
| F1 | In the item box: edit the item's rates for all batches. |
| F3 | Quick Item Search. |
| F9 | (Sale) Add the current item to the purchase Order List. |
| F10 / F11 / F12 | Save / Print / Save and Print. |
15. Tips and common questions
I can't edit a bill.
Click Edit first; saved bills open locked. If it says View Only, your role isn't allowed to edit that bill or it is too old. Ask your Admin.
An item doesn't appear when I type it on a Sale.
It may be out of stock or every batch may be expired (when Negative Stock is Block), or the item may be inactive. Check Reports → Item Stock.
The rate on the bill is wrong.
Check the Rate Tier at the top of the bill and the customer's default tier. Change rates in Miscellaneous → Edit Rates or press F1 in the item box.
The cash in the drawer doesn't match.
Open Accounts → Day Summary for today: it shows the day's money by payment type. Salesman collections count only after they are remitted.
I deleted a bill by mistake.
Deleted bills cannot be restored. Enter it again; an Admin can tick Bill No to reuse the same number.
A customer's balance looks wrong.
Open the Customer Statement for a wide date range; every bill and receipt is listed with a running balance. Click any line to open it.